LOL!! last week we had a little 3 day Spellbinders blast and I said we'd have a random draw at the store - someone who ordered during the 3 day period would win their shopping basket!! Well!! we got a little sidetracked what with my birthday and all...
So, here is the winner!! I can't tell you how many stamps she won!! That would be indelicate, but I sure hope she's pleased!!!
Congratulations Cassandra Jones of Australia !!!!
I've popped you an email!!!

Sunday, 30 January 2011
Friday, 28 January 2011
More Fun and Games!!!
Hello everyone! Lisa the Mousekeeper squeaking in to let you know of a couple of Waltzingmouse Stamps events you won't want to miss!
The first is that we've finally settled on a theme for the February Friends of Waltzingmouse Stamps Blog Waltz, which will begin on February 17th. We'll be celebrating Buttons!!! Yep, show us your Waltzingmouse creations featuring buttons... one, two, three or more! Whatever moves you!
If you've never waltzed with us, you can find all the information right here on the Waltz With Us page. Last month we had 13 new waltzers. Let's top that number in February, shall we? It's loads of fun!
For those of you who uploaded the HTML for the blinkie, I'm afraid you'll have to do it one more time... and I swear this will be the last time! lol I have finally figured out how to switch out the graphic without touching the HTML. You can always find it on our Waltz With Us page, but here it is for you to copy and paste into an HTML Gadget (or similar in Wordpress or Typepad) on your blog:
<a href="http://waltzingmouse.blogspot.com/p/friends-blog-waltz.html" target="_blank"><img border="0" alt="Please join us for our Friends of Waltzingmouse Stamps Blog Waltz" src="https://sites.google.com/site/thecraftsmeow/images/attachment.jpeg" border="0" alt="Photobucket" ></a>
Note: if you need to shrink the size of the graphic, go into the blinkie gadget to edit, click on Rich Text, and there you will see the graphic, which you can click on and pull the corner in to make it smaller.
We'll open the forum for links for those who will be participating on February 1st (or as soon as I get back home and at the computer after CHA! lol) And remember, you can still waltz and play the game for a chance to win a prize even if you don't have time to make a card/project.

The SECOND big news is that we've started a new monthly Christmas Card Challenge in our forum!!! Generally, here's the scoop (see Lynn's fabby card above):
• A new challenge will be issued on the 10th of each month in the Playroom Forum (although January's was posted late, you still have plenty of time to play).
• Once you have created your project, upload it to the special WMSCCC gallery
• Each card must contain some Waltzingmouse Stamps’ images, but does not have to be exclusively WMS products to be eligible for prizes
• All projects will be Christmas themed
• You may make as many projects as you like for each challenge, but only ONE is necessary to enter the challenge. We encourage you to make batches of cards since our end goal is to have enough hand-made Christmas cards for each person on our “list”.
• You can play along when and if you want – make it suit your schedule. For example, challenge cards for January may be uploaded anytime before June to be eligible for the “halfway point prize”. The same goes to be eligible for the GRAND PRIZE – projects for all twelve months much be uploaded to their appropriate gallery prior to the end of December.
And, yes, there are prizes to be won... big prizes! Not to mention that everyone who participates is a winner because they'll have most...all?...of their Christmas cards done well before the holidays!
So nip on over to the Christmas Card Challenges forum for all the deets and to find out what the first challenge is. If you're not yet a member of our forum, it's easy peasy... just a few clicks, no embarrassing questions, and you're in!
Have a fabby day!
Wednesday, 26 January 2011
Celebrating Claire!
ED - Ladies!!! Thank you all so much!!! I am THE worlds worst person at remembering birthdays, and so it makes it even more special that you all remembered mine!!!! Thank you so much!! And my eyes just about popped out of my head when I saw who the special guest is!!! lol, how on earth...???
Hello everyone! We've heard through the mouse-vine that today is someone very special's birthday. Yep, it's THE Head Mousetress herself, our Claire! We can't possibly let the day go by without a celebration, so please join us as members of the Waltzingmouse Stamps and Mischief Makers design teams, plus a very special guest, send our good wishes to Claire.
To make things easier, we're bloghopping waltzing, so each blog will link to the next. However, just in case there's a break along the way, the links are provided below.
Enjoy! And Claire, just know this... we LOVE YOU!!! Happy Birthday!!!!!!!
Hello everyone! We've heard through the mouse-vine that today is someone very special's birthday. Yep, it's THE Head Mousetress herself, our Claire! We can't possibly let the day go by without a celebration, so please join us as members of the Waltzingmouse Stamps and Mischief Makers design teams, plus a very special guest, send our good wishes to Claire.
To make things easier, we're blog
Enjoy! And Claire, just know this... we LOVE YOU!!! Happy Birthday!!!!!!!
Tuesday, 25 January 2011
...CASE Competition - play with us!
ED - you don't need a GC to enter Jan!!!! use whatever you have to hand!! it's more important to join in and have fun!!!!
Edited to add: CASE means Copy and Share with Everyone... in other words, be inspired by someone's card/project and make your own in similar style... put your own twist on it... and acknowledge from whom the inspiration came.
Edited to add: CASE means Copy and Share with Everyone... in other words, be inspired by someone's card/project and make your own in similar style... put your own twist on it... and acknowledge from whom the inspiration came.
Please link your CASE competition entries here in this post! Sorry, I fluffed the inlinkz and the wee mini pics of your projects won't show up - it'll just be a link to names for this one!!
We are holding a special challenge after the party. We invite all you folks to CASE a card/project from the 3 days of Spellbinder fun that we had from Friday to Sunday just passed! Scroll back though my posts to see links to the fabulousness that the DT produced!! I stand in AWE!
Start Here.
You will have one week to link your entries to the WMS blog post and then we'll pick a random winner for a prize. You may enter as many times as you like. One random winner will receive a set of Grand Nestabilities Dies - Grand Labels 4 and a set of stamps of their choice!
Have fun!
Monday, 24 January 2011
More Winners!
Lisa the Mousekeeper dropping back in to announce the winners of a stamp set of choice randomly drawn from all the comments left on the design team posts... one for each of the three days of the event! Yowser!!!
From Day 1, the winner was drawn from Carly's blog and is LaurieJ!!!
From Day 2, the winner was drawn from my blog (Lisa) and is Rosemary!!!
From Day 3, the winner was drawn from Sandie's blog and is Polly Pierce!!!
Congratulations ladies! Please email Claire at claire.brennan1@ntlworld.com with your choice of stamp set and mailing address, and she will get your prize right out to you!
Thanks to each of you who visited each blog and left comments! So very much appreciated! From the feedback we've received, the event was a huge hit!
Claire will be back soon with the winner of their shopping basket and to set up the CASE competition. Enjoy!
January Waltz Winners!
Lisa the Mousekeeper squeaking in to announce our winners from the January Friends of Waltzingmouse Stamps Blog Waltz. Oh my goodness gracious! What a wonderful turnout we had for this month's waltz! If I counted correctly, we had 13 new waltzers!!! That is a record! Welcome to injoystampin, sharon777, gingerbumblebee, Rudlis, Muckyfingers, Tricia219, Anabelle, Paper Addiction, Carol S, Suelelli, Nora Anne, Krafty Kat and Peppermintpatty. (I sure love the names you ladies come up with!) I decided that this deserved special recognition, so I put each of your names in a bowl and drew out a winner... and the lucky newbie is Peppermintpatty aka Karin!!! Karin, you win a template of choice from Waltzingmouse Stamps! Please email your choice to Claire at claire.brennan1@ntlworld.com and she will email your prize to you!
If I missed your name as a first-time waltzer, please let me know and I'll put you in the draw for a future waltz.
All waltzers' names were put in the draw to win a stamp set of choice, and the winner is Gladiola64 aka Janet!!! Congratulations Janet!!! Please email Claire at claire.brennan1@ntlworld.com with your stamp set choice and mailing address and she'll get your prize right out to you!
As for the watermark game, well, I think we might have made it a wee bit difficult this month because only ONE person got the right answer,.. 22... and that is sagruss aka Stephanie!!! Congratulations to you, too, Stephanie!!! You have GREAT eyes, although please don't send us your optometrist's bill when you find yourself in need of new glasses after searching the posts! Please email Claire at claire.brennan1@ntlworld.com with your stamp set choice and mailing address and she'll get your prize right out to you!
We hope you all will join us for our next waltz on February 17th. Details will be posted soon!
Back soon with the winners from comments left on the design team blogs during our three-day Grand Calibur party!
Sunday, 23 January 2011
...fashionably late!

I spent so much time embossing everything in sight yesterday that I didn't leave myself enough time to make a card!!! Today I managed to finish one that I started yesterday!!
And so, I am fashionably late for the party, just squeezing this card in before we wind down our Spellbinders party!
If you haven't seen them already, off you go to visit Sandie, Lynn, Jennifer, Belinda and Laurie!
I was impressed by the embossing capabilities of the Grand Calibur, so much so that I got a little carried away, ribbons, string, skinny twigs, all got passed through the GC yesterday...and then I had an idea!!!
Stitching!!! I LOVE stitching, I love the look of it, but I also love the texture!! I thought I would try my hand at embossing stitches!!
I have a fairly cool sewing machine, I was a quilter before I made cards and there are some pretty fancy stitches on my machine. I ran out some straight lines of a little leaf pattern stitch and passed it through the GC. Fabby!
What I got was a lovely homespun texture!! You can see the actual stitching on he left and the embossed texture on the right. Here's a tip - if you fancy trying this, do your stitching on as thin a piece of paper as you can, that way they can't 'hide' in the paper when you are trying to emboss the onto a piece of thicker cardstock.

I got the sponges out...lol, and tried sponging the front...

and then the back...cool! two looks for the effort of one. I chose to use a circle of the front texture on my card above, I trimmed it out with a circle nestie (Spellbinders classic circles small). As the plates are so big on this machine, I trimmed out the lacy circle mat and the little sun shape at the same time. (Sun shape is the smallest circle in the lacy circles set)

I added the little paper pieced tree and birdie from Teeny trees. I grounded the image by adding a string landscape, these are held in position on the front with two tiny pieces of extra sticky double sided tape. A Lacey circles mat and a piece of patterned paper (Cosmo Cricket Togetherness pad) cut into a square mat complete the front section.

Then I made a string background texture for the background panel - I laid out some strips of the same string in lines across the base plate of the GC. Then I laid a sheet of card over, added the tan mat and embossing plate and fed it through the GC.

I liked being able to custom make a nice subtle texture to suit my card!

Hope it tickles!!!
I do hope you have enjoyed our little party, I'm still catching up - I've been embossing all day!
Don't forget -
• We will be drawing a random shopper from the 3 day party period to win their basket for free! I will announce the winner tomorrow as the deadline is midnight tonight!! (my time, check the clock on the sidebar!)
• If you've been leaving comments on the DT blogs (party posts) you are in with a chance to win one of the 3 comment prizes!!
• Also, tomorrow we will invite all you folks to CASE a card/project from the 3 days. You will have one week to link your entries to the WMS blog post (which I will post tomorrow, Monday) and then we'll pick a random winner for a prize. You may enter as many times as you like. One random winner will receive a set of Grand Nestabilities Dies - Grand Labels 4 and a set of stamps of their choice!
Thanks for coming to our party!!!
More Party Fun!
ED - I'm gonna try and squeeze in another wee card later on! I have gotten the embossing bug!!!! - Claire
Hello everyone! Lisa the Mousekeeper slipping in to give you the links to the rest of the design team members joining the party today. Are you having fun? I know I am!!!
If you're just now finding us, please scroll down to this post for all the details about what we're up to and how you might win a prize or two!
Off you go to visit Sandie, Lynn, Jennifer, Belinda and Laurie! Be sure to come back tomorrow for the start of our competition to win a set of Spellbinders Grand Labels 4 and a stamp set of choice!
And don't forget... today is the last day to place an order to qualify for the drawing to win your shopping basket for free!!! Good luck!
Saturday, 22 January 2011
And the party continues!
Lisa the Mousekeeper popping in to give you the links to the design team ladies joining the party today!
If you're just finding us now, you'll want to scroll down to the next post for all the details about what's going on and how to win prizes!
Today's party girls are Bonnie, Julia, Anya and me! Enjoy!
If you're just finding us now, you'll want to scroll down to the next post for all the details about what's going on and how to win prizes!
Today's party girls are Bonnie, Julia, Anya and me! Enjoy!
Friday, 21 January 2011
...welcome to the party!!

Good morning and welcome to the party! Usually at this time of the month we are having a release, but this month we're doing something a little different!! We are celebrating!!
What are we celebrating? Well, we are celebrating our good fortune, we got something rather special for Christmas, we were blown away to receive Spellbinder Grand Calibur machines!!
If you have visited me before you might know that I am ADD.IC.TED to Spellbinders die templates. All of them. I dare not admit in public how many of these things I actually possess...and if you tell my DH I will strenuously deny mentioning it...just kidding, he regularly packs them away for me after I have a craft explosion.
Right before I get on with the card deets let me tell you what's at the party for you! Opportunities to win free stuff!
The Party will last from today (Friday) until Sunday. 3 days.
• Folks who purchase anything during the 3-day event (8.00am this morning 21st Jan to midnight Sun 23rd - all my time) will be entered into a draw. One person will be randomly picked at the end of the 3 days to receive their shopping basket free!
• We will also draw one random winner per day from comments left on one of the DT blogs just like we do for regular releases (only there will be three days of winners rather than just one!). Each winner will receive a free stamp set of their choice!
• We will also be holding a special challenge after the party. At the end of the event, we will invite all you folks to CASE a card/project from the 3 days. You will have one week to link your entries to the WMS blog post and then we'll pick a random winner for a prize. You may enter as many times as you like. One random winner will receive a set of Grand Nestabilities Dies - Grand Labels 4 and a set of stamps of their choice!
DT ladies at the party with us today are:
Don't forget to leave the ladies a comment for a chance to win!
Grand Calibur - the low down!!

Soon as this was released I wanted it. I wanted it so bad. Turns out I have a fairy god-sister, because my wish was granted!!! I could not believe my eyes when this baby landed at the doorstep!
I have a purple wizard which I have always loved, and nothing on the planet embossed like my little purple dude, but the truth must be told, I live in a tiny house, and the crank was a little bit noisy for dead-of-night craft sessions. I also have a cuttlebug, and it's fine, the embossing is nowhere near the wizard, but it is quiet.
Then came the Grand Calibur. This machine is the answer to my current problems. I have found that the embossing is a lot crisper than my cuttlebuddy. And the Calibur is quiet. ahhh. The side handle features a generous grip, which I found very comfortable to operate. There is a suction plate on the bottom that actually sucks. And at last I am no longer rowing the wee cuttle across the table...lol!!
AND can you see the plates? They have the names printed on them. This thing is pretty fool-proof. Cutting and embossing sandwiches can be mixed up easily and the simple action of having the names printed on them is genius.
Huge tan embossing mat. Fab.
 Living in a small house, I was a little worried that the Calibur would be a monster, but here you can see it beside my wee green thingy. It's actually not that much bigger, which makes the difference in cutting capacity so much more striking. Also there are no wings to fold out, just a little white 'tray' piece at the front which only needs to extend out about 2 inches at most. It's quite neat really, I was surprised by that.
The cutting capacity is huge. Here I have laid out two full sets of label die templates on the one cutting plate so that you can get an idea of how much you can cut all in one go.
I found that the Calibur cut all of these cleanly in one pass.

The opening on the Calibur is wide. UK ladies will be interested to note that A4 sheets can fit easily in the opening with no need to trim.
I tried a piece of standard US cardstock through the opening and had to crinkle the edge up slightly to feed it through the tray, I didn't mind this as i was interested in the die cut shapes and the edge was going to be scrap. If I was making a project using US cardstock, and I wanted the edges of the paper to be smooth, I can simply remove the white tray, 8.5 inch paper will then feed through no problem
There are a couple of methods for doing this and here is a link to a video showing how.
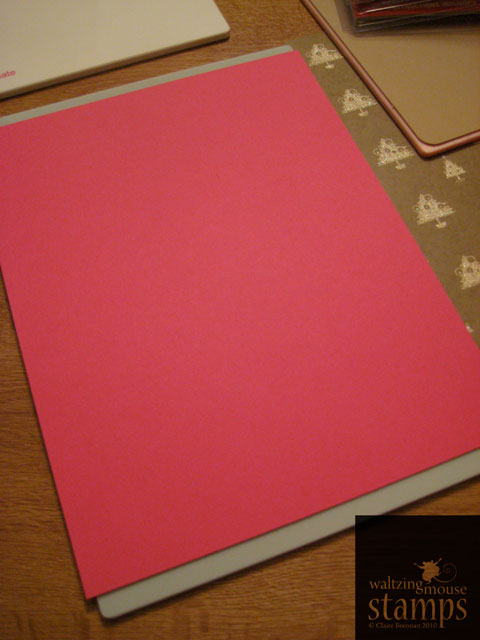
For today's card tho' I didn't even get as far as die cutting! lol, I used the tan embossing mat and a couple of little paper doilies to make a simple embossing on a piece of plain cardstock. You know how when you buy doilies there are sometimes 3 or 4 sort of stuck in a layer together? well, I didn't separate mine. I just laid them on the base plate. Put a piece of cardstock over the top and layered on the tan mat and the pink embossing plate, and ran it through.

I wanted to show you that even something as fine as a few paper doilies can generate a lovely embossed image to use on a card. I picked out the embossed detail with a little sponged distress ink. I dressed my image very simply with a button, a piece of ribbon and a couple of rows of faux stitching, done with a gray pencil. The sentiment is from Say It with Style, which, incidentally, was our first Spellbinder compatible stamp set, released in August 2009!!!

Later on, I had a go embossing whatever I found to hand - here I ran some pieces of tinsel through the Calibur and got a rather interesting rope effect, I hope to use this on a card tomorrow! I love experimenting!


Hope it tickles!
Tuesday, 18 January 2011
...new goodies at the store

I am adding a few little 6x6 paper pads to the store today. I love Cosmo Cricket papers and typically I buy them and then horde them LOL! Before I had the store, Cosmo Cricketness was hard to find in my neck of the woods and so I have jumped at the chance to add a little stock of these goodies to the store on a trial basis. I imagine all you USA ladies will be tripping over these in every LSS, but where I am, these are still a bit of a novelty! lol.
Unlike my stamp designs, which I aim to keep available for as long as possible, paper collections tend to sell out, and it still pains me to remember missing out on the last remaining Cosmo Cricket Wonderland pack in the LSS!
So, I have a handful of these wee paper pads in the store, they will only be available for as long as I have them in stock - once they sell out, I can't guarantee replacements and so the back-ordering facility will not be available for these items. This is very much a little trial.
Since we ship everything in envelopes, you might like to bear in mind that one of these little pads is roughly equivalent in weight to two of the large stamp sets.
They will retail for £6.75GBP.
Right down at the bottom, there is a Basic Grey Kraft pad, also 6x6 - I look forward to using mine up - I purchased two - one for using and one to look at! lol!!!
I am tickled!


Monday, 17 January 2011
....January WMS Blog Waltzing...you in?

LOL, I cannot believe I made it!, I couldn't find my clear blocks!! I tidies them away before Christmas and couldn't remember where!! lol, finally got them at midnight!!!
So woohoo! here I am in the first WMS Blog waltz of the year! for details of how to play along check this page, or if you want to dive straight into the list of blogs/gallery posts participating go here (you will need to be able to access the forum to see the list). Don't forget there is a wee competition running...Have fun!!!
Anyhow, I have seen a stack of cards lately with wee dinky banners on them! I love banners and thought I'd make up some of my own. I wanted ones with a fancy top and so I die cut a large circular shape with the largest die in my Spellbinders Lacey Circles die set, which I will be adding to the store in the next day or so, along with some other goodies... (shameless plug!)
I sliced up my lacey circle pizza style to get my pennant shapes, sponged the edges, distress inks of course, and inked the edges with rich cocoa memento ink! Added a few buttons, strung them on some linen thread and set aside.
I wanted a sweet background paper to set them off and so I stamped my own with the polka dots from Off Beat Backgrounds and then i went in with the spotty heart from Sweethearts. The sentiment is also from Sweethearts.
I slung the pennants over the background, which I had cut slightly smaller than the card. I put a tiny piece of foam adhesive under each pennant shape to keep it up off the card.
I stamped the card base with a text background from Text-it - I love the extra long borders, they are more than big enough to fit the entire length of a card.
Hope it tickles, I'm off to have a peep at all the other blog waltzers!
Saturday, 15 January 2011
...Spellbound!
ed- Carole - Yes!
if not you can check it all out here.
I was blown away by the variety of designs that are being released, and you just know I've been drawing up a storm...
So far my favourite is the labels 18...oh drool. If only I had a set of those....
Actually, I do...and the stamps to match...BUT!!!! I must warn you, there are others....
We are getting ready for what promises to be a gi-mungus release in February....there will be stamps a plenty for many of the new Spellbinder dies...more details on that later.
But first, we have a party to go to:
You're Invited!
to our Party
21-23 January
here, on the blog.
bring notepads - to jot down ideas!
There will be prizes!
It will be fun.
make sure you come over,
it'll be grand...
;)
Monday, 10 January 2011
...Help for Katie

Folks, we are asking you for help - we need you to pop over to Jak's blog to read Katie's story. We are now fundraising in the hope that we can assist with treatment costs and also give the wee folk a treat.
What we're offering is a huge big bundle of digital images for just £15 - please go to Jak's to see the entire bundle it is huge - and drawn by a wide variety of designers, I am sure there will be something in it to tickle you!
If you are able, please purchase the bundle - there is a paypal button under the images.
The please tell as many folks as possible about this fundraising event - facebook, twitter, wherever you can.
The card above features one of the digis that WMS has contributed to this event. We think Katie needs some emergency hugs and we just know that you folks can help us to give this special lady some huge big squishy hugs!
Thank you.
...be part of it!
Jak Heath, a terrific crafter that I am proud to call my friend, is running a superlative digital stamps offer in aid of the Help for Katie appeal. Many of you guys will know Katie and what she is going through at present and Jak has stepped up to organise a very special event so that we can all spread a little love and support in Katies direction.
I will be back later today with my card, but in the meantime, shoot on over to Jak's and feast your eyes on what is on offer, she has all of the details if you are unfamiliar with Katie's story.
Friday, 7 January 2011
...Happy Friday!
OMGosh! 'sbeen so long!!! how are you? I trust you all had a good Christmas? We had our fair share of 'spanners' in the works, with intermittent water supplies, snow, building works, snow, flu and snow...
I have to say it - I know I shouldn't, but there is something about snow that lifts my spirit! The rest of the planet gets cross, esp my DH, he thinks it's unreasonable of me to like the white stuff since he has to be out driving in it, and of course I'd rather he wasn't, but it does my heart good to look out upon a frosty field, and there's no point in denying it!!
Anyhow....Just wanted to pop on and let folks know that ALL order placed over the Christmas vacation period have now shipped!! I believe that mail is still moving slowly, particularly in the USA and indeed I see reports of more bad weather in USA, so you folks have my sympathy, I sure hope things ease up soon.
At present I am still catching up with emails and I expect that will take until the end of the weekend, so please, if you have emailed me and not heard from me, hang in there, I will get to you, it just might take a moment or six!
Chat soon!
Wednesday, 5 January 2011
Waltzes and Winners
Lisa the Mousekeeper squeeking in to finally announce the winner of a stamp set of choice from all comments left on the 12 Days of Christmas Waltzingmouse Style Day 12 post! And the winner is Smilie Girl!!! Congratulations! Please email your stamp set choice and address to Claire at claire.brennan1@ntlworld.com and she'll mail your prize right out to you!
Good news...shipping resumes today... weather permitting. I know the subject of shipping is sore with many folks after last month's challenges with backorders, Homeland Security and severe weather conditions. To say we are heartsick over the situation is an understatement. Thank you so much for hanging in there in spite of the delays.
More good news... the thread is now open in the forum to link your blog if you are participating in this month's Friends of Waltzingmouse Stamps Blog Waltz. We hope you will! The theme is Valentines/Love. For more information regarding our monthly waltzes, you'll want to click here.
Back soon with more!
Tuesday, 4 January 2011
The Daily Dare 11th Day of Christmas
Hello everyone! Lisa the Mousekeeper here to get the fires burning again in the new year. We're beginning to re-awaken after a long winter's nap. (*wink*) We hope you had lovely holidays with family and friends and that you're rested up and ready to continue the Waltzingmouse journey with us!
We're kicking things off by participating in The Daily Dare 12 Days of Christmas festivities! Waltzingmouse Stamps is sponsoring the 11th Day of Christmas. In case you missed it, you can read all about it on The Daily Dare blog. "Da rules" are quoted here:
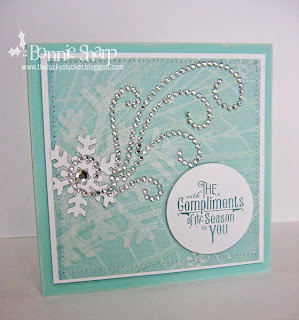
Our challenge is to use snowflakes in your card/project. You are not required to use Waltzingmouse Stamps, although of course we'd love it if you do! The keyword for uploading to the Splitcoaststampers gallery is DD12days11. We've included a link list below so that you can also link your card here to share with us and others, but in order to be eligible for the prize, you must link to Splitcoaststampers!!!
And what is the prize, you might wonder? A stamp set of choice, of course!
For inspiration, some of our design team ladies have created these gorgeous cards and scrapbook page layout:


We'll be back again soon with more fun and news!
We're kicking things off by participating in The Daily Dare 12 Days of Christmas festivities! Waltzingmouse Stamps is sponsoring the 11th Day of Christmas. In case you missed it, you can read all about it on The Daily Dare blog. "Da rules" are quoted here:
For each day there will be a challenge and also a "gift." Each challenge will have its own individual keyword to be used for uploading your project to the gallery at [Splitcoaststampers]. The deadline for submissions is midnight on Sunday, January 9th. That gives you a few extra days to play! Winners will be chosen (one for each challenge) and announced on Monday, January 10.
Your entry makes you eligible for the prize of the day, and you can play any or all of the challenges you want. You can upload as you go (more fun for the rest of us) or you can play them all and upload them all at once before the deadline. Doesn't matter, so long as you have uploaded your card before midnight January 9th."
Our challenge is to use snowflakes in your card/project. You are not required to use Waltzingmouse Stamps, although of course we'd love it if you do! The keyword for uploading to the Splitcoaststampers gallery is DD12days11. We've included a link list below so that you can also link your card here to share with us and others, but in order to be eligible for the prize, you must link to Splitcoaststampers!!!
And what is the prize, you might wonder? A stamp set of choice, of course!
For inspiration, some of our design team ladies have created these gorgeous cards and scrapbook page layout:


We'll be back again soon with more fun and news!
Subscribe to:
Posts (Atom)
Welcome to my blog

Hi, I’m Claire Brennan and I'm a crafter. I am currently designing new stamps for Gina K Designs as well as prepping some of the popular WMS sets for re-release with Gina - it doesn't get any better! Thanks for stopping by, sure hope you see something different here!
click to visit me on Etsy

connect with me


Follow me on Feedly

Shop my stamps at Gina K Designs

click the pic
Designing for Gina K

Popular Posts
-
 Good evening and welcome to the March release at Waltzingmouse Stamps. We design and produce clear stamps made from the best quality ph...
 -
 ED - the competition on this post is now closed. Thank you for playing along - the winner can be found here after 6:00PM my time today (...
 -
 Ladies and Gentlemen, may I welcome you to our very first SOAP event!!!! Hurrah! You might be aware that recently we changed our schedu...
 -
 Hello folks and welcome to the second day of inspirational posts for the Gina K Designs May release - I'm even more excited t...
Cherished Visitors
Cool stuff
