Pages

Showing posts with label technique. Show all posts

Tuesday, 16 January 2018

...January New Release Blog Hop- Day 2


Good morning/afternoon folks! Welcome to the second day of hops with the Gina K design team for our January release stamp sets! 

My apologies to anyone who tuned in yesterday expecting to see my day one post, due to unforseen electrical issues I was not able to get up and running yesterday. Many, many bad words were spoken, and with feeling, but hopefully today's post will make it...

Today we are featuring sets from Theresa, Lisa and myself! Be sure to comment on each of the blogs as you hop because we will be going away THREE $25 gift certificates to Gina K. Designs, one gift certificate each day!  Comment for more chances to win! Check StampTV Big News Forum a few days after the hops conclude where the winners will be announced. 

OK first up is the new set by Theresa, its called Framescapes, Enchanted Forest and it's a delightfully whimsical scene builder:

http://www.shop.ginakdesigns.com/product.sc?productId=3074&categoryId=16

I love how, as well as the large frame scene satmp it's also possible to create litle tiny mini scenes and I have concentrated on those for my samples:

 I adore this mushroom stamp and had to create a little scene around it! I isolated the tiny scene on my card by dry embossing a decorative frame around it and sponging, with the die still in place, to create a focal place for my scene on the card front. I coloured with copics and added some white dots with paint. y fairy and her butterfly friend are playing hide and seek and they are stamped in Dark Chocolate ink.


My next bunch of samples show the 3 fairies from the set in their own little scenes, these are just delightful for tags and other tiny items! Much sponging, and then stamping with Gina K inks, which work beautifully on these solid stamps, I love the coverage.


The next set up today is You Are, by Lisa Hetrick, our newest designer!

http://www.shop.ginakdesigns.com/product.sc?productId=3075&categoryId=16

I could not get away from that beautiful wreath image for all my samples for this set:


Since I am always thinking Christmas, the first thing I envisaged with this set was a Christmas Wreath and thankfully Lisa had included the word 'Joy' as part of a sentiment on the set, perfect! I just masked off that one word and made it my focal sentiment. I stamped the wreath twice and added various bits and bobs with the accessory stamps until I was happy! Finished with a couple of dabs of that fabby new goo - Crystalline drops, new by Gina K! LOVE that stuff.


Took the opportunity to ink up only part of the wreath for my inside panel.


Playing with that wreath again, this time in more harvest-y colours - I thought  I might accent the sentiment with a copic marker this time, I quite like this effect! Also thought it'd be fun to do a little piercing actually on the wreath stamp, I love how this turned out.


This one might be my favourite though! I stamped all my images with pure lemon juice and then used my heat tool to make them come alive as scorch marks, then I went back in with a fine liner in brown and sort of doodled the outlines of the stamps - this is a great way to add your own style to any given stamp, you really should try this, you can't go wrong!


I added a few extra details free-hand, I so enjoyed it that I went ahead and made an inside panel as well!

Last up, it's my set - Geo Thanks!

http://www.shop.ginakdesigns.com/product.sc?productId=3073&categoryId=16


I've been after a nice geomentric all-purpose set for a while now! So many  options for this set and I'm just scratching the surface with my samples today, but now that my computer is playing nice again, I'll be able to upload a few more soon! Right, I'm off, I'm itching to see what everyone else has made of Geo thanks!! LOL! Sure hope these tickle!


Just before I go, here are the links for today's hop! Enjoy!

Friday, 30 June 2017

...Lovely Lilies


Morning! Last night we had the Gina K new stamp release - there's a ton of new goodies available over at Gina's - to see all the new stuff pop over here.

My new set is called Lovely Lilies and it's a layering set that you can use in a few different ways. Here's what it looks like:
http://www.shop.ginakdesigns.com/product.sc?productId=2950&categoryId=16

The main Lily image comes broken down into three solid layers plus a line art outline, plus a separate stamen stamp, and you can use all of these together or you can use only a couple of the layers, or maybe just the lineart outline - that's a good option if you like to colour with copics or pencils, or maybe watercolours.

Just in case you could use a little help putting these together I have a little graphic for you:


I'm still working on a video, but I can tell you right now that my favourite way to stamp these is to begin with the darker colour first and then stamp the medium tone over that finishing up with the lightest tone, it is way easy to line them up when you do it this way. Thanks for popping in, if you have any questions, just leave me a comment :)

Monday, 22 May 2017

Gina K Designs –Fun with Fabulous Foil-Mates Blog Hop

Hi everyone! Gina K and the team have received such amazing feedback on the new Foil-Mates, Fancy Foils and dies that we have decided to put together a special hop for you today! This blog hop is a blend of a video blog hop featuring tutorials from Gina K and a few members of the team and a traditional blog hop featuring beautiful cards from other members of the team. 

Over the past few weeks, the Foil-Mates products have been flying off the shelves at Gina K Designs. Please be assured that if they are out-of-stock, they will quickly be back on the shelves again soon. In fact, Gina just stocked the shelves with a fresh batch of Foil-Mates, Fancy Foils and dies and more will be on the way.

If you are new to Foil-Mates, they are used to step-up the shimmer and shine in your card projects! Creating cards is never more easy and beautiful when you work with this new line of foil products. From beautiful pre-printed Foil-Mates, to stunning colors of Fancy Foils, when you combine them together the outcome is stunning! Discover how many various combinations of different cards and invitations you are able to create with Gina’s Foil-Mates products. With many of Gina’s most popular signature colors now available in foil, coordinating with Gina K Designs card stock and ink has never been easier!

We would like to thank Therm O Web for being such a great partner in the Foil-Mates line of products.


Enjoy the gorgeous inspiration samples from the team and then comment on each blog. We will be selecting one lucky commenter at the end of the hop and that person will win a $50 Gina K Designs gift certificate! To see who won, check the Big News Forum at StampTV a few days after the hop. Ready for some inspiration? 
Here is a video I have created for today's hop:


https://www.youtube.com/watch?v=szwKMwdCe8c&feature=youtu.be

Ready for more awesome creations?! 
Just click on the links below for more from Gina and the Cast & Crew:

Gina K
Beth Silaika
Cathy Tidwell
Chris Dayton
Claire Brennan
Donna Idlet
Juliana Michaels
Karen Hightower
Laurie Schmidlin
Melanie Muenchinger
Rema DeLeeuw
Sean Fetterman
Sheri Gilson
Silke Ledlow
Susie Moore
Theresa Momber

Don’t forget to pop over to the Gina K Designs Store and check out all of the new products available this month in the “What’s New” section at http://www.ginakdesigns.com.

Thank you for stopping by!

Sunday, 26 February 2017

...Springtime Baskets card and tips Video


Hello folks - I've just loaded a video for the Springtime Baskets stamp set. Folks who have this set already, or who just got it at the latest Gina K Designs release might find this helpful. I've also made up some free cutting files (for use on electronic cutters such as the Silhouette, there's a .svg and a .pdf file) and you can access those by clicking here. Again, indulge me, I'm just beginning - apologies for the camera shake...


http://www.shop.ginakdesigns.com/product.sc?productId=2862&categoryId=16

Monday, 1 August 2016

... Gina K Designs DT Blog Hop, Day 1


The Cast and Crew for Gina K Designs welcomes you to another fabulous blog hop celebrating the new stamp sets from the July StampTV Release Party! We hope to inspire you with some beautiful card projects as you hop along to each of the designer’s blogs! Today, we are featuring two stamp sets by Therea Momber and Melanie Muenchinger.

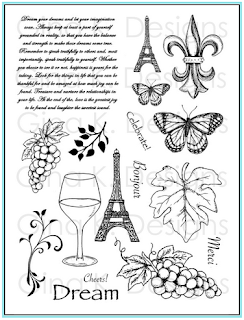
French Flair

The first set we are featuring is French Flair by Theresa Momber. Theresa has created this wonderful set that will leave you feeling like you may be in Paris or strolling around the wine vineyards in Europe! 

http://www.shop.ginakdesigns.com/product.sc?productId=2652&categoryId=16

The wineglass stamp in the set got me thinking that it would be fun to do something a little different and create a wineglass lampshade. These are fun to use on the dining table for a cozy feel. The shade I've made for today's hop features the small Eiffel Tower stamp and the text stamp from Theresa's set and is perfect for a romantic dinner, but this idea is something that you could use to dress up your table for any reason or season.

The only thing I'm going to insist on is that you use a battery operated candle. Do not use a naked flame candle with these, they are too close to the shade. There's a plethora of good battery operated candles available today - just look at the illumination I was able to get with an already well used well used battery candle, above. Isn't that cozy?

Wineglass shade tutorial and Download

 Have you time for a little how-to? sure hope so, gonna go ahead anyhow... :)

OK, here's how I started - I cut out my shade shape from 12x12 cardstock, you can make a smaller or larger shade to suit your glass. I have a fairly large wine glass...no clue why that might be...
I stamped the smaller of the Eiffel Tower images repeatedly around the lampshade shape, and I stamped these on the side that I wanted to be showing, the outside of the shade.


On the reverse, or what will be the inside, I stamped an allover pattern with the text from Theresa's set. You can see the position of my tape in the pic. It's really important to use your strongest adhesive here, you'll see why in a bit.


Then I simply adhere the ends, without folding the little tab. You don't want your shade to have a corner...
You can add a little trim if you wish, a little ribbon or braid - I added a little scrap of floral braid that I had lying about. This is what it looks like in the daylight - c'est bon, n'est-ce pas?


However, it really comes into it's own when you turn off the lights - I love how the Eiffel tower image is just that bit stronger than the text, stamping on both side of the shade creates an interesting depth to the overall pattern.


Now that's pretty, but here's a tip for how to really make it shine. If you brush your lampshade with a little oil, the cardstock will turn translucent and you will get so much more glow! This is where extra strong adhesive comes into it's own, but just to be on the safe side, I didn't slather the join with oil, I just very lightly brushed over that area. You can see in the pic below that where I have brushed a patch of this lampshade, it is starting to turn transparent and you can see the text starting to show through from the reverse.


Yep, actually brush on some oil directly to the lampshade, I used olive oil because that's what I had in the cupboard. This is another major reason why you do NOT want to use these with a naked flame, use battery tealights only folks! I insist.


This is my battery candle in my wine glass, it's just a cheap battery candle that I picked up in Lidl, I got a box of 4 of them for under £2 last Christmas.

Now below I have two pics for you so you can see the comparison. The left hand pic is my lampshade before oiling, the right hand pic is my lampshade after oiling. Oiling is optional and if you want your shades to become a family heirloom I would consider not oiling, there's no way to tell if the oil you are going to use will stand the test of years in a cupboard, but for a piece of ephemeral fun it works a treat!

Oiling can be useful to make ordinary paper and card go translucent, especially if you are using lighter coloured cardstock. You can use light pinks, greens blues etc, colours that you can't sometimes find in vellums etc. If you are happy to use neutral tones then you could consider using baking paper or greased proof paper for your shades or even a heavy vellum, these would not require oiling as they are already translucent. Be sure to experiment with your cardstocks and the inks you will be using, just in case the oil makes your ink run. I didn't have any problems with that, but I did a test patch just to check first.

The French Flair set is filled with images that would look great on these shades!


If you fancy making a wineglass shade for yourself, I have made up the cut file as
a .pdf and as an .svg file, you can either use it in your Silhouette Cameo or similar or print it out as a pdf and just cut it out with a craft knife.

You can access those files here - click link to get them in my dropbox.https://www.dropbox.com/s/earnzazdqkms7vr/Wine%20Glass%20cut%20files%20Claire%20Brennan.zip?dl=0
All I ask is that you don't pass on the file, but tell folks where you got it and encourage them to come and get it from here - Thanks folks, much appreciated.


Theresa's set also features a gorgeous butterfly in two sizes and I used the larger one here as a focal point on this card. I stamped the butterfly in grey over Ivory cardstock and then stiched around the panel before sticking it to the card base. I stamped the large butterfly in black ink and then used clear embossing powder with a heat gun. This does two things for me, it deepens the black colour and it also means that the copic markers won't make the black ink bleed. Then I coloured with yellows and oranges, I think it looks like a mini stained glass window, the colours are so vibrant.

Stately Flowers 10

The second set we are featuring is Stately Flowers 10 by Melanie Muenchinger. As Gina says - Melanie has done it again! She has added another wonderful set to her Stately Flowers collection. This is set number 10 and what a wonderful set it is! You will be able to use all of Melanie’s flowers sets to fill the seed packet in this set as an adorable way to send the perfect message! The possibilities are endless for making beautiful cards for any occasion.

http://www.shop.ginakdesigns.com/product.sc?productId=2653&categoryId=16


I am addicted to the dogwood flowers in this set, and for this card I stamped them on some white cardstock and coloured around them to make the flowers pop. I then made a seed packet out of an old brown envelope using the seed packet stamp. I cut an aperture from the front of the envelope (I opened out the envelope first and used a craft knife) and popped the coloured flowers in behind the aperture. I didn't want my flowers to be hidden behind the top of the seed packet and so I sliced around the edge of that top flower (craft knife again) and made sure to slide the seed packet down in behind the flower. I really adore these flowers, did you see my card from yesterday, I'm sure you did, if not, here's a reminder...


Okeydokey!
 That's all for today folks, don't forget to comment to be in with a chance of winning a $20 Gina K Designs gift certificate! To see who won, check the Big News Forum at StampTV a few days after the hop.

If you are ready for more inspiration just click on the links below 
for more from Gina and the Cast & Crew:


Don’t forget to pop over to the Gina K Designs Store and check out all of the new products available this month in the “What’s New” section at http://www.shop.ginakdesigns.com/

Thank you for stopping by!

Monday, 27 June 2016

...an espresso of thanks


Howdy do? I'm taking the ostrich approach to politics this week and just sort of ignoring everything that has been happening with Brexit etc, I've no clue how all of this will pan out and sadly I don't think the folks 'in charge' have any clue either...but hey-ho the sky hasn't fallen in today so far, so here's a card.

I made this for last weeks MIUM challenge over at Stamp TV forum. I must admit I'm pretty hit and miss with challenges, but I wondered what MIUM meant and nope, I'm not going to tell you - pop over here and see this weeks MIUM challenge for yourself, lol!! and then maybe you will be reeled in like I was!

Anywho this card started as a great excuse to further explore my new Gina K inks and I am smitten, I'm loving these inks for solid images, I'm loving how the stamped image seems to sort of smooth itself out as it dries, the coverage is so good and the colours that I have used so far are scrumptious.

I stamped my coffee pot and did a little random shading with a brown colouring pencil just to give the image a little depth. I didn't bother with working out where a light source would be or anything so complicated, I just added a little rough shading on areas of the image that I thought would look good. I wanted to keep the illustrated feel rather than make it look too realistic.

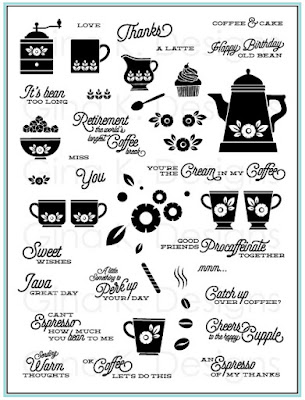
I used the Coffee Set stamps, just released at Gina K's for this one. Huge mileage in this set, many, many sentiments for lots of different occasions.

http://www.shop.ginakdesigns.com/product.sc?productId=2528&categoryId=-1

How to ground a stamped image

Many times when you stamp an image, it can look a little lost there, floating on the page and when that happens you need to ground the image on the page somehow by making it look like it was meant to be there. There are loads of ways to do this, and I did it for this card by roughing in a suggestion of a tablecloth. Here's how, I'm using a slightly larger set of images on my example, but it's the same principle:

 I masked the bottom of the coffee pot with a post it. The I lightly sketched diagonal lines with a colouring pencil.


 Changing direction, I then went back and sketched diagonals going the opposite way. I sketch lightly and I stop short of the edge of the panel, I was just interested in creating a 'suggestion' of cloth, I wasn't aiming to actually draw a tablecloth. I lightly shaded a little crosswise also, but not enough to take away from the diagonal lines.


I removed the post-it note and had a nice tablecloth effect. You can see how I did the same thing on the actual card below. The background floral panel was stamped with flowers and dots from the same stamp set. Inks used were Sweet Corn and Dark Chocolate both Gina K Designs.