Pages

Friday, 30 November 2012

...Introducing Ornate Ornaments...


ED - The competition is now closed!

Good morning and welcome to day three of our previews, if you are new to us, we design clear Photopolymer stamps and we're having a new release tomorrow! We have 4 new sets coming out and you are invited back tomorrow for our Design Team blog waltz, and to see the stamp sets in their entirety! Hope you can make it, there will be inspiration and eye candy and we will draw the winners from the commenting competitions on this and the DT blogs!

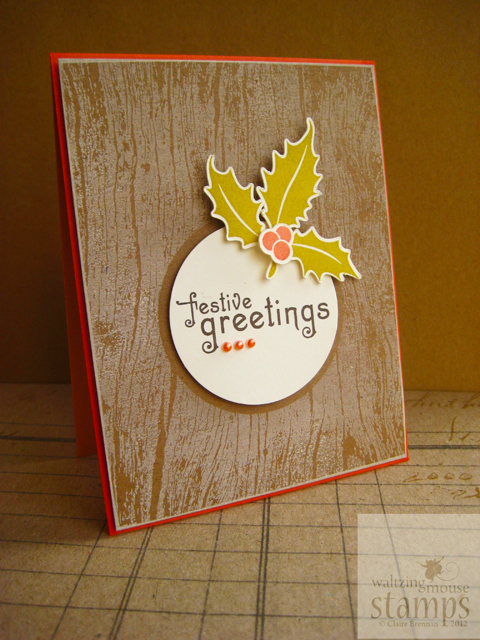
I have a Christmas set for you today. I know, you're going to tell me it's a little late in the season for these, and yep, I'm going to agree with you!

Fact is these should have been out in October, along with a few other Christmas goodies, but you know the drill...we are about two months behind yada, yada, yada...

Anyhow, I was just saying to somebody the other day that since Christmas Stamps are pretty much the reason WMS exists in the first place, I could not resist letting a set through. The rest of our glorious Christmas designs will have to wait until next year...but this set, I had to have.

It works with dies from all three Spellbinder ornament dies template sets released so far and I love the sheer opulence of it!

DT ladies who are previewing this set with me today are:


Don't forget to leave comments on the girls blogs as you pass by, you could win some stamps!

I used the largest stamp in the set to create this very special tag It co-ordinates with the largest die in the 2010 Heirloom ornaments set which many of you may already have. Highly detailed this stamp looks fabby just stamped, but I chose to emboss it in gold and then colour in selected areas with copics - I kinda made up the colour scheme as I went along, and I love how it turned out. Basically the swirly bits were coloured red and then bits were picked out in a darker red. The stripes are coloured a mustard shade and the wee scalloped detail was coloured brown. I love colouring graphic images like this because there is no right or wrong, it's not like colouring in images of people where I struggle with tones. I find this sort of colouring very theraputic, almost like doodling.

The sentiment is also from the Ornate Ornamets set, there are some 4 different ornament stamps, 14 sentiment stamps and one rather special snowflake 'leg'.


See those snowflakes at the bottom of the gift baggy - these were created with the snowflake leg - there was not room in the set for a full snowflake, but there was room for a leg! See the photo below where I have stamped the leg twice in red ink:


You can see clearly the dot at the bottom of the leg image - it is there so that you can easily line up the next leg by placing the dot on the stamp directly over the dot from the first impression. Also those little curly lines - see how they just touch? If you keep goung round in a circle with the curls just touching and the dot centered you get a perfect snowflake! It is much easier to stamp it than read about it! LOL!
 

Comment Competition!

So since I'm itching to know what you think, I want to ask you to leave a comment here, telling me which set you think you like best from our samples so far - one commenter will win all 4 sets! I will make the draw tomorrow at 6:00pm just before the release goes live at 7:15pm!

Hope it tickles!

Thursday, 29 November 2012

...Introducing My Heart


Good morning and did you see what the ladies created for yesterdays previews? I was blown away!! You need to see what the ladies did with the Woodgrain Backgrounder before you sip another sop of coffee! Scroll down toe the previous posts on their blogs as you go by this morning!

Welcome to the second day of samples for our December release - it's a wee mini release, we have 4 sets for you. The set I'm showing a tiny portion of this morning is called My Heart.

Did your sweetheart ever carve your initials into a heart on a tree trunk? Nope? me neither, lol, but the idea is a sweetly innocent take on romance - perfect for Valentines. Ideal for cards for guys, and also for mass producing if your wee folks take goodies into school for Valentines. While I was drawing these up it seemed to me that hearts and woodgrain were perfect Valentine partners!

Since it's me and it's getting close to Christmas though I have other ideas for this set just right now but before we get to that, take a peep at what the ladies have created for us with this set and another of the new releases, Woodenheart Alphabet, a pretty rustic alphabet, perfect for adding your intials to the My Heart hearts.


I made up some wee bag wraps - this is the sort of thing that I could actually manage to mass produce under pressure. I'm thinking of end of term treats for the class, or party favours or even wedding favours, so super simple. You can make these easily by downloading the free cut file, which will be available freely from Saturday onwards at the store in the freebie section. The little window is shaped especially to fit a couple of the stamps from My Heart, but I'm sure they'd still be perfectly usable even without those stamps.

Incidentally, the white fuzzy halo I'm getting on my shots recently is driving me nuts...I'm sure it's a setting that I don't know how to set but bear with me until I find out...

The stamp I used is a rustic heart design with an internal wreath, plenty of opportunity to embellish this stamp - here I have used plain bling, coloured up with a copic pen to match my candy.


The wraps are designed to house plain cello bags, the sort of thing you buy to put cards in etc. - I would use pre-wrapped candies in them if I was unsure about whether they were foodsafe though. You can also use plain food/freezer bags trimmed down to size., just fold them over at the top and staple them once to the front of the wrap, just under the flap.


I have used only one single stamp for this mornings samples and I do hope to be back with more later, but I am rather excited to be working on the facility for USA folks to order these sets individually and so you might forgive me if I slip off and make sure that is in place for Saturday....

The set is a large 6x8 set with a total of 22 stamps. Six different heart motifs, one border stamp and 15 sentiment stamps on the theme of love. The stamps in My Heart are drawn to echo the grain of the Woodgrain Backgrounder set we previewed yesterday - I'm in heaven with matchy matchy - how about you?lol!

I will be making cut files available for this set.

Hope it tickles!

Wednesday, 28 November 2012

...Introducing Woodgrain Backgrounder Set


Good morning, I have a little decor item for you this morning to kick off the December release samples. I wanted something to sit on a shelf that just wasn't a card! I made a little woodgrain box and popped in a little Christmas scene, it's all very simple but I thought it was quite cute!

Some of the DT ladies are sampling with me today, and some of the girls will be showing their samples on Monday Tuesday and Wednesday!

Ladies sampling today are:
Bonnie Sharp
Tosha Leyendekker
Kelly Schirmer
Sandie Dunne
Clare Buswell
 Julia Aston
Jennifer Holmes

The woodgrain backgrounder is a huge stamp in our new series of backgrounders and the best way to use these is described here in the store 'Learn' Blog. At 4.5 by 5.75 inches I am finding it is definitely easier to leave them on the carrier sheet and ink them up with the brayer - I'm indebted to Lynn for that neat technique!

This woodgrain backgrounder is actually part of a large stamp set - there are a few more doodads in the set and hopefully I will get to show you those later on.

The woodgrain pattern is a large scale image, and it's going to be suitable for every season. When I was drawing up rough drafts of this set I was haunted by an image that I had seen, a beautifully captured photo of weathered wood. The image was so simple, but yet so perfectly detailed that I could not resist asking the photographer if I could base my stamp design on the woodgrain in his shot. I was delighted to be given permission to do this and so I am thrilled to bits to bring you this highly detailed and realistic woodgrain pattern, drawn from the stunning photography of Mr D VanderYacht. I think it has just the perfect amount of contrast and I am smitten with this stamp! You may have seen me use it last week on this project, isn't it stunning in white ink on kraft!


Today's Christmas scene is a box with an oval cut from the front, the overall box is 4.25 x 5.5 inches by an inch and a half thick, it feels like a wee chunk of wood! I stamped 4 card size pieces of card with the Woodgrain backgrounder in Cherry cobbler ink and then trimmed an oval out of one panel with a Spellbinders die template (Classic ovals). I used one panel for the back and cut the other two panels up to get sides and tops, if you fancy having a go let me know I can probably make up a quick template for this...but it'll be after the release on Sat...

 I added a little scene inside the box using 3 little bottle brush trees that I rubbed with cherry cobbler - I wanted a cream and red colour scheme.

Behind the trees I inserted a little panel with a sentiment from Yonder Star and a star motif, which I embossed with copper powder. There is sponging with Antique Linen distress ink pretty much everywhere....


I cannibalised a little broken Christmas decoration to get the berries and leaves and hid the cut end of the wires with a nice bow....the provenance of that ribbon is forgotten, but I am sure it's not too hard to get red spotty ribbon at this time of year, if you must have it leave a note and I will look it up!


Hope it tickles!! I'll be back later/tomorrow with more samples!

...December sneaky...

Good evening! I have a little peek for you. We are having a little release this Saturday, 1st December - there are 4 new stamp sets to show you between now and then and this is a peek of one of them, I will be back in the morning to begin our samples and I can't wait to hear what you think of these!

Waffle

If you are familiar with WMS you might be aware that 2012 has not been a particularly good vintage for us. There were personal lows this year with the loss of my mum and following that we had a supplier issue which has set us back at least two months. This lead to a very haphazard release schedule and I just wanted to pay tribute to my lovely DT ladies who have stuck with me literally through thick and thin this year. The girls have had to put up with tight deadlines, last moment requests, disappointments when sets had to be cancelled and a general all round inability to plan their own time, due to my own schedule being so haphazard this year.

They are the very best bunch of girls I could have hoped for, they have kept us afloat in rough seas and I am hugely in debt to both the DT ladies and the Mischief Makers for their unending fabulous creations. Thank you ladies!

Thanks is also due in heavy measure to our friends who keep coming back to us, shopping in the store, pinning our creations on our gallery, on Pinterest, on Facebook, sharing their WMS creations on their blogs or chatting about us on forums. Folks who get the word out there and helping to make sure that we can continue, that I can continue, that I can draw stamps and at the same time be at home for my wee folks. Thank you.

Sunday, 25 November 2012

...Poinsettia Duo

ED - Deborah, thank you!! so far I love it, but I'm still a big sucker for dies, I love the whole process of die cutting, so I don't think one system can compare with the other, but I find the Cameo very easy to use - I did get the upgraded software though and it is fabby!

Helen, thank you! the plaids were stamped with SU inks, Old Olive on the 3 flower card and River Rock on the single bloom card :)

Pat! Fabby, hope you are enjoying the Cameo! the copics I used were: YR09 Chinese Ornage, base coat - followed byt he dark shadows in R59 Cardinal and then I blended and shaded with R27 Cadmium Red, the yellows were Y17 Golden Yellow and YR25 Pale Sepia and the greens were: YG 95 lae Olive and G99 Olive :)


Good evening! I hope you all had a wonderful Thanksgiving, here in UK we don't celebrate it, but it's always nice to be reminded to be grateful for all the good stuff, so it's a tradition I've been plotting to cultivate for some time.

We were delighted to have my brother-in-law home from Australia on Thursday where he has spent the last few months looking after his son who was in a terrible accident. It sounds like everything is going well and our nephew is making great progress in recovery and we hope to have both him and his mum home before long also.

Just listening to the stories of the very many kindnesses that were bestowed upon our folks in Australia was inspiring to say the least and reminded me that it might be time, once again, to run a  little competition that we have held each year since WMS began. So, in the next couple of days I hope to post here with details of this years Nice List competition - it's never anything harder than a comment for this comp so stay tuned and join us, it's one of my favourite events to run at WMS.

Today I have some free cut files for you - Poinsettia cut files to match our Big Blooms Poinsettia set.

Get your free cut files here - they are supplied in .dxf and .svg formats.


I used the cut files to create some small poinsettia flowers to go in my seed packet frame. I cut out6 small poinsettias with the Cameo and then I stamped the small Poinsettia flower 6 times with memento Rich Cocoa Ink. I coloured 3 in red and 3 green. I mounted the red flowers on the green flowers with foam tape for a little dimension. I added a few bits of bling to the centre of each flower. I had coloured up the plain rhinestones with an orange copic marker before I stuck them on, this works very well if you don't have coloured bling - I tend to buy everything in neutral shaeds and colour with copics as I need it.

I stamped a seed packet image onto cream cardstock to provide a frame for my poinsettias. I layered this on a little green spotty paper (Graphic 45 from the Christmas Past collection)

I made a background panel with the Cabin Plaid backgrounder stamp, I am loving how easy it is to make great backgrounds with these, and I always use this tip.


Next up is a single bloom - the medium size Poinsettia flower from the set - I cut out two on the Cameo and stamped in memento Rich Cocoa as before, colouring with copics. Blinged as before. I used the same two backgrounds as before but split the panel with a diagonal ribbon. My sentiment is white embossed, and then rubbed over with a little distress ink to help it pop.


Hope it tickles, and folks if you are of a mind, please do spread the word about our free cut files, we'd be delighted if you could!

Wednesday, 21 November 2012

2012 Waltzingmouse Secret Santa Holiday Card Exchange

We paper crafters love to make cards for family and friends – that’s what we do, it’s our passion. We also get especially giddy when we receive a hand-made card created by someone who loves this hobby as much as we do. What’s better than to open your mailbox to find,  among the bills and junk mail, a beautifully crafted card?
Would you like to make and receive a card from a Waltzingmouse Secret Santa? If so, be sure to check out this post in the Waltzingmouse forum (The Stamping Room-Stamping Chat) for all the details of the 2012 Waltzingmouse Secret Santa Holiday Card Exchange. You make a card and receive a card. Simple right? Don’t delay, as the deadline to sign up is Monday, December 3rd, but you will have until the 12th to put your card in the mail.
Not a member of the Waltzingmouse Stamps Forum yet? No worries – go to this page and click on the “register” button at the top right of the page. Then, once logged in, click here to see the detailed information about the Secret Santa Holiday Card Exchange.
Please join us, and in the spirit of the season, give someone a happy mail day.

Tuesday, 20 November 2012

November Blog Party Recap...And a Winner Too!

What a fabulous turn out we had for the November Blog Party.  We were pleased with the variety of projects and we are thrilled that you took time to participate.  We know that there are many on-line activities that are available for your participation, and we are happy that you deemed the WMS Blog Party worthy of your time and creative talent.  If you haven’t had a chance to see all the fantastic projects, it’s not too late, they can all be found here.

Each and every project was truly fabulous; each one unique and creative in design. The following three projects really caught my eye.

Joyce’s beautiful maple leaf was die cut using Spellbinder’s Maple Leaf die into her card which she backed with a very festive plaid pattern that she stamped using the Pic-Nic Patterns set. Her card not only gives thanks, but contains a very iconic fall image with her lovely autumnal colors.

Another lovely die cut card also was created by Jill Norwood. Jill used the largest die from the Opera Tags Dies, exclusive to Waltzingmouse Stamps. Within the die cut, Jill used the tree from the Blessed by You set with a top border enhancing her tree, from the Seasons of Love set.

Vickie Z wow’d me with the gratitude mini-book she created. The front title of her mini-book is from the Say it Loud-Winter Holiday set. If you haven’t taken a closer look at Vickie’s project on her blog, you MUST stop by. Each page is filled with lovely fall images and an amazing design. What a great way to capture the moments of blessings we tend to forget if you don’t make note of them.

Amazing creativity, wouldn’t you agree? Thanks to everyone who participated. There is so much creativity among WMS customers, and everyone is a winner because they have created and shared their work inspiring us at the same time. However, only one participate can win the free set that WMS is giving away to a lucky winner today.  We used Random.org to select our winner this month.  Congratulations goes to:

#25 Lee

Congratulations, Lee.  Please e-mail Claire at Claire.brennan1@ntlworld.com with your stamp set selection and mailing address details. Please use BLOG PARTY WINNER in your subject line.  We appreciate EVERYONE’S participation and support of the “Blog Party”.  We hope you had as much fun blog creating as we did seeing your beautiful projects.

We appreciate your participation by gracing us with your presence at our Blog Parties and we look forward to January 1st when we will post the theme for our January 2013 Blog Party theme. Until then, may your holidays be the best ever.

Monday, 19 November 2012

...Freebie - Festive Foliage cut files


 Good evening ladies, I have a bundle of free cut files for all you folks who have the Festive Foliage Stamp set! You can download them freely here. My sentiment is from Compliments of the Season Two.

I used mine on the Cameo to trim out a few of these holly leaves and berries, I particularly like the clean graphic style of these stamps.


It is super easy to stamp on a cut file if you remember to put the cut out piece on a contrasting background like my red fun foam below.


Hope you have fun with these, and before I go, I have a wee tip for you when using large backgrounder stamps such as the woodgrain one I used here (oops, did i just let something slip?)


I leave the backgrounder stamps on the sheet they come on and lay them down face up on my worktop. At this point you can lay down a mask - I wanted an unstamped circle in the middle of my background pattern, so I placed a circle of paper (post it note) right on top of the stamp.


Then I inked up the stamp - I was in a hurry and was too lazy to reach for the brayer so I just dabbed the ink pad all over like I would with any small stamp. I find a brayer is excellent for inking up these massive stamps, but it's not necessary, I got a superb impression from this stamp without one.


Then I lift away the mask, a wee pair of tweezers is handy for this. This leaves a great big un-inked area, which was exactly what I wanted.


I laid my cardstock down over this and smoothed it with my hands to get the impression. I was delighted with the sharp clean circle that the masking creates.

In the pic below you can see what a nice frame it makes for the cream card circle which became the focal point of the card, just gave it that wee little something extra I thought!


 Hope it tickles!


Sunday, 18 November 2012

...November Gratitude


Good morning ladies! I have a card for the Blog Party! Scroll down to this post if you would like to see the other entries or join in, you might just have time if you are quick!

 My pic is not that great, I have misplaced my camera charger, so it was taken on my phone...ugh...but rather than miss the Blog party....

I used my Seed Packet stamp, one of my all time favourites, and I filled up the aperture with little flowers, a few Spellbinder cut outs to frame and that was it, I will be back with the details later if anyone wants them, but right now I'm trying to fix some glitches that have been happening at the store, a quick peek at the inside before I go...

It's a fancy dancy card as cards go for me, but it was a bit of fun and fulfilled my need to enthuse when I'm trying to say thank you to somebody.

Hope it tickles, I'm looking forward to getting a quiet moment later to look at all the other entries!!

If you entered, I'll see you later, if you didn't enter - why not?? lol, we'd love to have you join us next month, we party every 17th!

Saturday, 17 November 2012

November 2012 Waltzingmouse Stamps Blog Party–GRATITUDE

Blog-Party-Logo 70%25

Hello and welcome to the November 2012 Waltzingmouse Stamps Blog Party! It is our last Blog Party for 2012 and it is with grateful hearts that we express our joy and appreciation to have you join us for this fun and inspirational event. Are you ready?  Good, let’s get started!

As we close out the 2012 Blog Party year the theme GRATITUDE seemed so appropriate for the loyalty and support you have shown to Waltzingmouse Stamps this year.

What things are you thankful for? This month’s challenge could be a fall harvest card, a “thank you” card, Thanksgiving Day dinner place cards, table decorations or any theme which expresses gratitude, so use your imagination and show us some ingenuity. 
Create a card, a 3D project, or even a scrapbook page, using images from Waltzingmouse Stamps and join the fun.

Here’s how it works: Upload your entries to your blog or on-line gallery and then link up your creation using the inlinkz tool at the end of this post. We will leave the links open for 24 hours so that everyone will have a chance to play along, even if you haven’t created anything yet!  Once you link your project, you can check out all the other inspiring projects by just clicking on their link. Be sure to include the Blog Party Logo (seen at the top of this post) on your blog to easily identify your participation). How fun and easy!

A random selection of time zones are given below, so you can see how this works:

UK - 6:30 p.m. 17th November- 6:30 p.m. 18th November

USA (New York) 1:30 p.m. 17th November- 1:30 p.m. 18th November

Australia (Queensland) - 4:30 a.m. 18th November- 4:30 a.m. 19th November

Canada (Alberta) - 11:30 a.m. 17th November- 11:30 a.m. 18th November

Malaysia - 2:30 a.m. 18th November- 2:30 a.m. 19th November

Norway - 7:30 p.m. 17th November- 7:30 p.m. 18th November

You have 24 hours to link up your creation!  We all look forward to see your wonderfully creative projects.  Be sure to check back on the 20th of the month when we will highlight a few of the amazing entries right here on the blog! We will be on the lookout for projects that showcases extra special effort! We will also randomly select a winner for a coupon code good for a free Waltzingmouse Stamp set.

Let the fun begin and enter your direct link to start the party.

Wednesday, 14 November 2012

...Back in stock - Bright Season, Little Lanterns...


Back in stock we have:

Bright season
Little Lanters
Light of the World
Camellia
Appleblossom Seeds
Vintage Garden Flowers
Vintage Garden Produce

We have more stock arriving Friday, I'll post here when it comes in!

Tuesday, 13 November 2012

...Freebie cut files, Cracker Box


Good afternoon! I have another freebie cut file for you today, it's another magazine project and it is based on the hugely popular Three kings boxes from eons ago. Snag your free cut files here, and i will try to pop up some traditional template versions later this week, for folks who prefer their scissors! If you have been enjoying these free cut files, we don't mind if you tell your friends! LOL!

I used Seasonal Remedies stamps to make the labels, love the detail on those, the snowflake from Very Vintage Christmas to stamp the background pattern on the box,  and I think those were Fleur de Lis Square die templates, from who else but Spellbinders!!!

Hope it tickles!

Saturday, 10 November 2012

...fairy house...


Can't help it, love little boxes. This is another mag project and the cutting files may be accessed freely here. If anyone wants a how-to, shout, I might be able to scare up some pics I took while making it, but it's easy peasy, same principle as the tower box from eons ago.

I used Festive Foliage and the Cottage Home stamp sets to decorate my box like a wee fairy house!

This makes a super gift box, or glue the lid on and use it as a hanging decoration! make mini ones!! they are so dinky, must take pics of mine...

Hope it tickles!

Thursday, 8 November 2012

...brown paper packages tied up with string


Good evening! I have some simple package adornments to show you, I made these a while back for a magazine, I think it's ok for me to show you these now...LOL, hope so anyhow....

I used Fimo light, air drying modelling material in white. Since I had to supply info for the magazine, I can give you a quick run down, if you think you might like to make some:

Time to make: 5 mins plus overnight drying time.
Materials:

• Stamps used - Nutcracker Sweet, Candy Jar Christmas, Festive Foliage
• Fimo light, air drying modelling material in white
• Cream button twine (twine used is from Waltzingmouse Stamps)
• Parcel wrapped in kraft paper, widely available. Gift card pouches are made from kraft card stock using Seed packet template from WMS.
• Ink of your choice, and a stiff tipped brush such as a stencil brush. I used Ranger distress inks in Fired Brick, Crushed Olive and Wild Honey
• strong adhesive such as a glue gun

Method.

1. Make seals by rolling out Fimo light air dry clay until it is about 5mm thick. cut out circles using a pastry putter or an upturned egg cup.
2. Stamp the image onto the Fimo discs and leave to dry, preferably overnight.
3. Wrap parcels in brown paper and tie with cream button twine.
4. When Fimo disks are dry, use a stiff brush in a circular motion to apply ink to the white disks.
5. Attach finished discs to parcels using glue gun.

I am still shipping after the release but I hope to be back in the next few days with a few more of the magazine projects!

Hope they tickle!

Tuesday, 6 November 2012

Design Team November Release Blog Waltz Winner Announced!

It has been a busy few days since the newest Waltzingmouse Stamps Release. The Design Team did an amazing job with all of their samples, and we are all so happy that so many of you stopped by, left comments, and words of encouragement during the WMS Design Team Blog Waltz held on November 2nd.        
As promised, we have selected a lucky winner of a free Waltzingmouse Stamps set of choice. Each member of the Design Team selected one comment from their group of comments, and from those, we have selected a commenter from the blog of Becca Feeken as the winner. Do you want to know who that lucky winner is?

CONGRATULATIONS GOES TO: Christine Harrop


To claim your prize, please e-mail Claire at Claire.brennan1@ntlworld.com. Provide her with your contact information and set choice, and she will get your selected set on its way to you.
You have our most humble gratitude for taking the time to stop by our blogs and for your wonderful, uplifting comments on our projects and the newly released sets.

Sunday, 4 November 2012

...More Compliments


Well we're packing envelopes and writing up shipping lists but I just wanted to pop up this card that I didn't get a chance to show you in the run up to Friday's release.

Just in case you missed it we released 8 new sets on Friday, you can see them in the post under this one. One of those sets is Compliments of the Season TWO. I love eclectic Christmas greetings and I wanted another little bunch of randomly vintage sentiments with which to make this years crop of cards.

I particularly love this stamp 'A joyous Christmas Wish'. It is flamboyant enough to make a statement all on it's own, just back it up with some nice patterns and the card practically makes itself!

I stamped the sentiment onto a specially shaped panel that I had cut out with my Cameo - you can get the exact same cut file here - there is a little parcel of cut files to match this stamp set, all available as freebies on the store.

I created a mat for it directly from the software on the Cameo and cut that out of black card. I should mention that immediately after I stamped the sentiment in Versafine black ink, I sprinkled on some clear embossing powder and heat set it. This ensures a lovely glossy finish with the added benefit that the versafine ink does not run when I go in to colour portions of the image with copics.

I added a little red around the frame with a copic to help pick up on the ribbon I wanted to use. It's a spotty ribbon from M&S, they're selling it this year as gift packaging and it has little raised dots on one side. I found the reverse of the ribbon far more interesting and that is the side that you can see on my card. The little negative spaces where the thread goes through to the top side to create the dots was the ideal place to set some bling. I also coloured the miniature Christmas tree and added a golden glow around the star.


I used some striped paper from Graphic 45 on the centre panel and made myself a panel of festive background paper using the Vintage Christmas Backgrounder stamp - just released on Friday and already nearly out of stock! See this post for help using large background stamps.

Below you can see how easy it is to line up the stamp on the cut file shape. Working on a mat that is a contrasting colour to your card really helps you to see what you are doing.


Hope it tickles!

Friday, 2 November 2012

...New Stamps for November 2012

Good evening (or early morning, sorry Australia, Japan and Malaysia!) and welcome to the November release at Waltzingmouse Stamps!  If you are new to us, you are very welcome! We design and produce clear stamps made from the best quality photopolymer (that's the good stuff) and today we release 8 new sets!

Remember - FREE standard shipping for orders over £50 to Everywhere, yes, you're included! (approx $80.16 USD, $79.74 CAD, $77.11AUD, €62.35Euros, rates all subject to change) and if you don't need £50 GBP worth of stamps today you might be interested to know that shipping one set to US costs around $4.32 USD. We ship our stamps out from our company base here in Northern Ireland. Please note our free standard shipping offer does not include tracking. 

Design Team Blog waltz

Before we take another step, let me give you the links to the Design Team Blog Waltz happening right now where you can see some gorgeous examples of what you can do with the new stamps shown below, and we've been previewing for several days already so it's worth a scroll back to see what's new! Be sure to visit all of the DT ladies and Don't forget to comment, there's a prize!

Shipping Trial Today!


We are excited to be running a shipping trial with this release! We are in the early stages of setting up a USA based shipping service and we are testing our systems. Up until now, all of our stamps have shipped from us here in Northern Ireland - today we will have a bundle of the new sets available to ship directly from USA. Yep, folks purchasing only the USA bundle can expect their orders to ship to them from our location in USA.

Folks who need only one or two sets will of course be able to purchase as normal. All of the sets will be available singly as normal, and will ship from our UK location, as normal.  If you think you might be interested in a bundle, read on -

Here's how we see it working for the trial:

At 7:15pm today the store will reopen. One of the products for sale will be called November release bundle - USA. It will include the entire November stamp release. Folks living in USA or Canada, who wish to purchase the entire release, and avail of the much faster shipping time, can purchase the November release bundle - and we will ship it out from our location in USA.

Since this is the inaugural trial, I will be pricing the November release bundle - USA with a little discount, which will mean that you will be getting one of the mini sets for free!

And since we don't want any of our friends in the rest of the world to miss out there will be a November release bundle - UK at the same great price. This bundle will of course ship from us here in UK as normal.

Both bundles are over our £50 shipping threshold and so folks ordering these will pay no shipping!

There are a limited number of both bundles so once they are gone, they are gone!
So, just to recap:
• Folks ordering the November USA bundle only: your sets will ship out to you directly from USA
• Folks ordering USA bundle plus other sets: your bundle will ship out to you directly from USA, other sets will follow from UK
• Folks ordering some November sets or other sets not from the November release: your order will ship out from UK as per our normal service.

 
 And here are the New goodies for November


November release Bundle - with USA SHIPPING
All 8 sets for £73.90 (representing a saving equal to a free mini set)

Purchase all 8 of the November sets together and have your order ship directly from USA. there are a limited number of bundles available in our USA shipping trial, so once they are gone, they are gone!

Please note that if you have other items in your order besides the November release bundle, your other items will ship from UK as normal.


November release Bundle - UK
All 8 sets for £73.90 (representing a saving equal to a free mini set)

The UK bundle represents the same great value as the USA bundle, and ships from UK along with all other sets.

And all sets are available singly as usual below!

Yonder Star
Set size – 6 × 8 inches

Free cut files here.
A Western style Christmas set. Old Western lettering styles feature in 6 different feature sentiments that can be used either inside or outside of your Christmas cards. Shades of quilting in the accompanying star illustration. All picked out in a distressed style this set is perfect for creating a cozy homely Christmas with just a little tough of the unexpected.
 The 'Follow Yonder star' sentiment measures 1inche square and the solid star is 3.25 inches by 3.25 inches at the widest points. All images and stamp designs are Copyright © 2012 Waltzingmouse Stamps, Claire Brennan.


Yonder Star Backgrounder
Stamp size – 4.5 × 5.75 inches

A finely detailed quilt pattern background to complement the yonder star set. Perfect for imparting the warm fuzzies on all sorts of projects, this distressed design lends itself well to western, vintage, homemade, shabby chic and antique projects. All images and stamp designs are Copyright © 2012 Waltzingmouse Stamps, Claire Brennan.

Candy Wagon
Set size – 6 ×4 inches


A delightful treat-inspired set to help you create sweet toothed gifts with a western flavour. An elegant and simple image of the famous Candy wagon to dress up your gift giving at any time of year! 7 versatile sentiments complete a total of 12 stamps in this deliciously packed small set.
The wagon image is just under 2.25 inches by just under 2.75 inches, and the 'Jes Fer you' sentiment is just over a half inch by three quarters of an inch. All images and stamp designs are Copyright © 2012 Waltzingmouse Stamps, Claire Brennan.


Cabin Plaid Backgrounder
Stamp size – 4.5 × 5.75 inches

Based on the original Waltzingmouse Stamps Plaid-maker stamps this backgrounder is perfect for instantly creating a plaid background. Ideal for anything from Cozy Christmas to bright baby projects! All images and stamp designs are Copyright © 2012 Waltzingmouse Stamps, Claire Brennan


Compliments of the season - TWO
Set size – 6 × 4 inches

Free cut files here

An eclectic collection of Christmas sentiments in much the same vein as the hugely popular original Compliments of the Season set. Have Fun! The fabulously over-the-top 'Joyous Christmas Wish' stamp is approximately 2.75 inches square and the 'Noel' sentiment is just under a half by three quarters of an inch. All images and stamp designs are Copyright © 2012 Waltzingmouse Stamps, Claire Brennan
 

Vintage Christmas Backgrounder
Stamp size – 4.5 × 5.75 inches

Co-ordinating with the hugely popular Very Vintage Christmas and the original Vintage Ornaments sets, this densely patterned background stamp exudes vintage elegance! All images and stamp designs are Copyright © 2012 Waltzingmouse Stamps, Claire Brennan


Half Pint Heroes Additions
Set size – 3 × 4 inches

A much requested companion set for Half pint Heroes - let's hear it for the little guys! this little dud has a teddy bear friend, and I see him in so many different settings.

The fully assembled boy is 1 inch by 2.5 inches and the 'and he was very brave' sentiment is three quarters of an inch by just under 1.5 inches.All images and stamp designs are Copyright © 2012 Waltzingmouse Stamps, Claire Brennan


Sheriff
Set size – 3 × 4 inches
The Sheriff/Deputy badge. Earn yourself oodles of cardmaking time by stamping this out and pinning it onto your small person of choice, great fun for parties as well as cards!
The Sheriff badge is just under 3 inches in diameter at the widest point. The Sheriff and deputy sentiments are approx 0.7 inches by 1.2 inches. All images and stamp designs are Copyright © 2012 Waltzingmouse Stamps, Claire Brennan