Pages

Monday 29 June 2015

... been on the farm...


Good evening! We are winding down to the end of term here at home - the wee folks are moments away from the summer school break and I can't wait - I get to ditch the alarm clock for two months...bliss. 

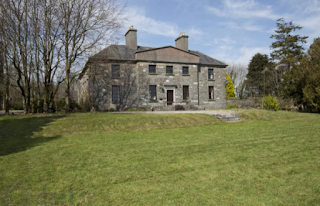
This year I promised little dude that he could have a party for some of his school buddies - his birthday occurs during a significant holiday and so he has never really had a party that he could invite school chums to. Been feeling a little bad about this as he has attended loads of parties over the years... sooooo, we had 'half year' birthday party for him and a few of his buddies over the weekend at a local farm - my dude is nuts about sheep... he got to feed the lambs - never seen a kid so happy.

I made the carrot topped muffins and the sheep crispie buns, but I had to get the big guns in for the cake - in the shape of my pal 'S' who has a cake making business - isn't that cake just the best ever! - check out the cracked eggs - Shaun is baking a cake...on top of a cake...giggle, this just tickles me all over.

Anyhow, this is why I have no crafty stuff to show you - normal papery stuff will resume tomorrow.....


Wednesday 24 June 2015

...rainbow hello!


Evening all. It was a glorious evening here tonight, I hear we are due for rain tomorrow, but it was beautiful here this eve - didn't see a lot of it tho - busy, busy. Just time to pop up a card for you.

I don't think I have even shown you the Brogue dies yet so I'll begin with this card. Super simple.


This is one of the dies in the new Brogues dies set that we just released. The brogue dies were meant to compliment the masculine sets at WMS, such as My Kind of Guy, but they are hugely versatile, I can see lots of projects benefiting from a brogue border. 

For this evening's card, I used the plain border - it produces a brogue pattern on one side of the cut and a handy pinked edge on the other side. I made my card with a bunch of these borders.

http://www.waltzingmousestamps.com/collections/new/products/brogue-die-set

I just cut five borders with the die and taped a piece of contrasting card along the back side of each cut. I arranged them in a pleasing layout and trimmed them to suit my card front size. I used a little foam tape on some of them to give abit of rise.


I die cut a hello sentiment (using this die) in white and then again in each of the 5 contrasting colours. I separated a letter from each colour and stuck those to the reverse of my white 'hello' - love how these cast a little rainbow shadow to match my colour pops. Quite like this wee card!


http://www.waltzingmousestamps.com/products/mini-hello-die-set

These brogue dies have lots and lots of little circles to cut and I like to use a stiff brush to help me just pop those all out. I get rid of most of them this way and only have to poke one or two stubborn circles out if I'm using thick card. Paper just seems to come away perfectly every time.


Also, can you see something interesting here?


What if I showed it to you in...gold?
These are the little negative shapes produced by the brogue dies - these make great confetti for shaker cards - I'm gathering a little bottle-full of gold ones!

Hope it tickles!

Saturday 20 June 2015

...a little hobby of mine

I don't really have much time for 'actual' real life hobbies, but one thing I have done ever since my very fist internet connection (over 15 years ago) is to surf property websites. 

I'm quite specific, I only ever surf Irish property websites like Daft.ie or Propertynews.com . It's a little interest of mine that is easy to fit in to the odd 5-10 minutes when I'm waiting in the card at the school or at an appointment. I love houses. I have always loved wee houses ever since I can remember my mother and I drawing them - we always drew houses with gables and dormer windows when I was small.

I sometimes daydream about having a little cottage by the sea somewhere, it's just a little escapism, but a few years back I had been surfing quite regularly and I could have estimated the price of most properties fairly accurately. - I've lost my edge a little recently, been a tad busy, but I just wanted to share a few of the little gems I found while trawling some sites recently. 

Now and again you find the most delicious little out of the way properties - I am hoping that since these are all for sale that the good folks who are selling them won't mind me showing you - I mean, these are all on the relevant internet property sites, I know it's a little voyeuristic, but I'm thinking it's ok... it's not like we are sneaking inside... lol

http://www.daft.ie/sales/trebeg-propogue-tallow-waterford/1073881/

Isn't this absolutely charming?

http://www.daft.ie/sales/derryinver-letterfrack-galway/1066233/

Such a view - who would not love this?

http://www.daft.ie/sales/farragh-house-mullingar-westmeath/1067088/

Now and again you find a stunning period property.

I love looking at all sorts of houses, sometimes the smallest and most basic are the most charming. I've always been interested in houses and not just for interiors, it's more about location for me. At the moment I live somewhere that's best described as 'handy' but wouldn't it be lovely to live somewhere pretty? Do you live in a pretty area? - I'd love to hear about it!

Thursday 18 June 2015

...Best Day...


Ridiculously simple card today - I'm up to my 'oxters' in shipping our Summer promo... I used my Best Day stamp and inked it up with various Versacolour shades of red and orange, I love Versacolour ink - it blends beautifully on the stamp. I stamped on a panel that I have cut with Scalloped Stitched Rectangles and sponged with distress Marmalade ink... added a few sequins from the Old Gold shaker mix - then ran back to the stock room.... catch you later!

Here's what I used:


Tuesday 16 June 2015

...Making way for Winter

http://www.waltzingmousestamps.com/collections/summer-promotion

Six years ago, when WMS began, I thought that I would always try to keep everything in stock. Six years later and I'm learning that there is only so much stock that my small property can hold. I have reached critical mass this past year and every time I stock up for a new release I lose vital areas of living space. I simply don't have the space required and I am going to have to finally let go of some of my much loved sets. 

The only sets I plan restocking are the 'A good Egg' 'Candy Wagon'and 'My Island' sets, but those are not scheduled for replenishment this year.

Quantities are limited - and once they are gone, they are gone (aside from the Eggs, Wagon and Island sets mentioned and the Ocean bound dies) Please be sure to select your basket ALL from the same shipping location - orders with split baskets may be delayed or lose out on items. 

We ship from USA to USA only. We ship from UK to everywhere including USA.

Items are individually discounted some from 50% off to 75% off. Stock levels are normally accurate, however if we find that an item is oversold, we will refund the sale item  immediately. All sales form this promotion are final. Sale will run until 30th June or stocks run out, whichever comes first. Some items are low inventory already though, so early visitors will have best pickings!

...PJ party winner!!


Folks - thank you all for taking part! I have really enjoyed this one - I didn't get my cards finished (sick kiddo) so I'll post them over the next couple of days - I was able to hover about on the web tho and managed to comment on everyone's cards - so it was actually quite nice to be able to do that!

We love this bunch of challenges to be completely open to everyone and to be a stress free comp where everyone has the same chance to win and so we draw a random winner each time - the Random Org thingy threw me up the 4th Challenge and the 4th entry from that challenge, which was:

Susan P with this card:


Congratulations Susan!! You win and not only do you win, but your prize is doubled because you used WMS on it - I have a great big £60GBP gift code for you - so pop me your email....I'll be waiting! lol!


Monday 15 June 2015

... Challenge 3 - Old Pajamas - June PJ party.


My entry for Challenge No. 3 - Old Pajamas.

If you are looking for the June PJ party - it is here (or scroll down to the post before this one!)
There's still a few hours left!

A quick bit of info - I used USA 1776 and...surprise, surprise.. the coffee baggie die to make some cute little table favors for your 4th July party - What's that? You're not having a 4th July party? Me either, but you could adapt this idea for anything,baby showers, weddings, birthdays....any excuse for a party will do...

OK - I removed the window part of the die - see how I'm real careful and use a bit of sticky tape to gather up all those wee pieces of metal that get snipped off. They can be binned safely this way.


I still wanted a window - I just want it to be a star shape, so I used a star die (from Boo die set). You can see how I tape it in place for the journey through the die cut machine - that's a cuttlebug plate so you can see what size this die is.

I popped some popping candy in my bags. I used food grade plastic in the windows, and I'm ok with popping candy touching the cardstock.


I added a wee frame to the window on front of my baggie with the slightly larger star die (Boo& friends witch die set). Then I made a little topper for the bag - it's just a circle with some fireworks and a sentiment stamped, and the bottom chopped off - I like that the flat base echoes the top of the baggie. The fireworks and sentiment are from USA 1776 - my throwback set for this challenge! I totally cased Jeanne's glitzy fireworks by adding a gem to each boom! Hope it tickles - gotta run try to squeeze in some more challenges!


Sunday 14 June 2015

...Welcome to the June PJ Party

Welcome to our PJ party folks - I'm so glad you could make it!
We have 4 challenges for you tonight - The links are now open - you have 24 hours to link up!
 Here's a run down of what's happening:

PJ Party Schedule
•The PJ party post and all challenge links are now live.
• Links will close at 11:45pm tomorrow, the 15th
•The PJ party winner will be announced just after 11.45pm tomorrow on the 15th of the month (all times are UK time).

Rules - a little housekeeping!
• You don't have to use Waltzingmouse Stamps to play along, but it will tickle us pink if you do!
• You can enter each challenge as many times as you like, using separate cards and separate links, but you cannot enter any one card in more than one challenge!
• Links should take folks directly to the blog post/spot where we can see/comment 
on your challenge entry.
• Please mention our PJ party and challenge on your blog or gallery post (- you are welcome to grab the PJ logo or sketch graphic and add those to your blog if you like)
 • You do not need to enter every challenge, but the more entries you have the better change of winning the prize!

Prizes
We will have one overall winner chosen at random from all challenge entries. The prize winner will receive £30GBP store credit for Waltzingmouse Stamps.

Now please note - this is important - if the winning entry uses Waltzingmouse brand stamps or dies the prize will be doubled and the winner will get £60GBP (approx $98USD)!

Please note that projects using only free WMS products will not be eligible for the double prize - though you could still qualify for the £30GBP!
OK - Here we go:
Challenge 1 - Can it/Pickle it

from Claire
using We Go Together, Candy Jar and Jar fillers jam packed.

from Jeanne


from Anya - Anya discovered that the inner circle from the Pretty Circles Die Set makes a perfect jar label. Put it on the lid, no adhesive, and screwed it right on under the band, easy peasy! Good find Anya
 from Julia

Make a project involving canning jars/jam jars - there are a number of WMS sets that involve jars - and don't forget you don't have to use WMS jars! Any sort of Jar - Kilner, Jam jar, sweetie Jar...see what you have. If you don't have any jar stamps, why not dress up, alter and re-purpose a real jar.


link your challenge entry here:


Challenge 2 - mmm....Coffee colour challenge
from Julia

Let's use this coffee palette from Design Seeds as our inspiration. Take coffee shades as your base and add a pop of Cranberry? Pomegranate? I'm ok with whatever your favourite red is.
link your challenge entry here:


Challenge 3 - Old Pajamas 
 from Julia

from Tosha


  from Jeanne
Use one of your older Waltzingouse Stamps sets to create a project for this challenge! We'll be digging out our USA 1776,  stamp sets for this one, here are some of our previous USA 1776 projects for inspiration.
link your challenge entry here:

Challenge 4 - Bedtime Story sketch 
Jeanne subbed in some fireworks for banners! I love how this worked!

 from Tosha

 from Julia

Here it is - Make a banner of some sort -you can pop it on a card, or hang it across your mantlepiece! Any size you fancy! Go ahead and create now so that your project will be ready to link up on the night of the party!  We don't mind if you play around a bit with this - so long as the spirit of the sketch shows through!
link your challenge entry here:


...'Sprinkled with love' and colouring on solid stamps.


Good evening/early morning... technically it's still Saturday night at my house because I have not been to bed yet...so I'm slipping in a quick card this evening to show you the new Dinky Doughnuts set that was released on Monday. I had not gotten around to posting any of the samples for this set yet - so it's high time, but with the PJ party tomorrow I've been a little busy...hence the late night squeeze...

Are you coming to the PJ party? Yep, of course you're invited! All the info you need is right here.

OK I adore doughnuts...who doesn't. I wanted a set that I could stamp in solid colours. Just because they are sold stamps does not mean you can't colour them in... I love to colour, but sometimes I like flat colour - I get the best of both worlds with this set.

The Dinky Doughnuts set has three different sizes of doughnut and a selection of sprinkles etc. See the examples in the graphic below.To create these doughnuts on my card I used the stamp in the top left hand corner - that's the doughnut base. I used the stamp in the top right (black image) that's the glossy icing and I used some of the sprinkles stamps.

The finished size of these large doughnuts is exactly 1.5 inches in diameter. These are going to be easy to use with a wide range of existing dies and punches. The medium sizes doughnuts turn out exactly 1 inch in diameter and the mini doughnuts are just a hair over 0.5 inches diameter.

If you click on this pic it will get bigger so you can see how the examples work. There's a couple of little 'face and cheeks stamps so you can go all kawaii with these (yep my younger kids are going through that kawaii stage....)

http://www.waltzingmousestamps.com/collections/new/products/dinky-doughnuts


In the pic below the doughnut on the right is just stamped. the doughnut on the left has had a tiny little bit of shading added with two coloring pencils - that's all. Just the tiniest amount of shading can turn a flat graphic stamp into a more dimensional image - this makes me happy - 'more bang for my buck' I think they call it... :)


In every release I have there is always 'The Problem'.  Sometimes it's a late stock delivery, sometimes it's a realisation that I didn't order enough of a particular items and sometimes, (ok, only once ever) it's the realisation that I didn't order a particular item at all.... How red faced was I, chasing up the die folks, only to realise that the order email, for the dies for this set were...ahem...still in my draft folder.... doh. Hoping to have the dies for next release, in the meanwhile it's Spellbinders to the rescue for the overall doughnut shape and the mini circle die from the Simple sprig die set is just the right size for the doughnut holes...phew...


Hope it tickles!

Thursday 11 June 2015

... Cozy Coffee baggie


Christmas is never too far from my thoughts and I had been itching to use that little mug from the Coffee set. In my head it contains hot chocolate, so naturally the thing to give with this card was mini marshmallows! Naturally! My coffee bag du jour contains mini mallows! Perfect amount to sprinkle on top of a mug of the hot stuff.

I love the new coffee baggie die and since I can't seem to stop making these, I'm looking at ways to add them to cards. Serendipitously, one of the new stitched rectangle dies is just the perfect size to create an aperture which fits the baggie perfectly. I used it to create a little hollow in the front of a raised panel into which I popped a baggie.


You can see in the pic below that  the front panel is around 3/8 of an inch raised off the cardfront. I made a sort of box behind the panel to keep it all tidy. If you would be interested in seeing the workings, leave a comment here, if enough folks are interested I'll do a tut.

The baggie is secured to the card by means of two holes punched all the way through from the front of the baggie to the actual card front - I threaded some twine through there to hold the baggie on 'til it was needed. I'm chuffed with how this works!

The papers were from the Authentique Cozy Collection.


Hope it tickles!