

Feeling completely inspired by this gem of a card below made by Tosha and shown here on Tosha's blog during our recent release, I rushed out and bought white chocolate! Tosha's card gave me an idea for some super easy Easter treats! Love this - so super simple and raises a laugh too with the wee folks.


I started with a largish bar of white chocolate and broke off two thirds of it for melting to make the white parts of the fried eggs. Melt your white chocolate using your favourite method - I zap it in the mic for 10 seconds at a time, because I have neither time nor patience for faffing around with a bain marie...
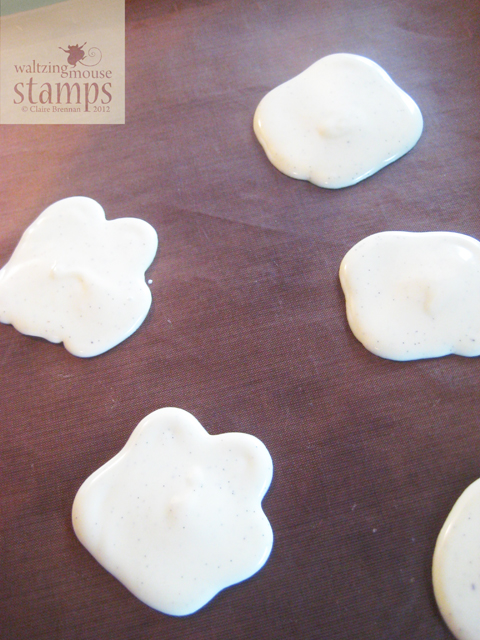
Drop large spoonfulls of your white chocolate out onto baking sheet I have that clever non stick poly sheet stuff from Lakeland - which also makes a great sheet for sponging ink on...)
I got a bout a half a dozen 'splats' out of my 2/3 bar. If any of your egg splats have a little raised dimple in the centre upon hardening, shave it off carefully with a knife - you want a nice flat base for the yolk. Let these bases harden before you add the yolks.
When you are ready for yolks, melt the remaining 1/3 of your white chocolate bar and pop in a drop or two of yellow food colouring. At this point - and this happens to me all the time - your chocolate may seize and not want to play any more. Do not panic. Boil the kettle and pop yourself a herbal tea on.
Take a spoonful of boiling water and drop it into the seized chocolate. You may need another spoonful, but stirring vigorously at this point with the boiling water should bring your yellow chocolate back to something like a smooth glossy pourable gloop again.
When I was making my eggs the chocolate seized as soon as I dropped in the food colouring, but you can see from the pic, the boiling water trick fixed it right away.

The best thing is to drop a spoonful of the yellow choc in one place and let it settle all by itself, it will naturally spread out in a circle.

Mmmmm......

I popped mine into a little greaseproof baggie (glassine bag) and added a paper topper that I had cut from some of our new Digital Folk Art papers. I made the topper up as I went along, it's basically a rectangle folded in half with little flaps to one of the sides.

I gave it a fancy edge with a Spellbinders Edgeabilities Classic Postage Stamp die. I popped two little holes along the centre fold for ribbon.

This is the topper flipped right side up - I am loving these digital papers.

The whole notion of Folk Art cries out for handmade embellishments and so I cut out two 'leaves' with my Spellbinders 2012 Heirloom Ornaments dies and added a little stitching to reinforce the leaf idea. Don't those ornaments make fabby leaves!

Popped it on the baggie with a flower made from felt - and cut with a Spellbinders Blossom One die. The finishing touch was the Keep your sunny side up sentiment from the A Good Egg stamp set. Easy peasy!
Now I want to make millions of little mini fried eggs and give them out to the wee folks buddies!!
Hope it tickles!


Genius! I think I'll have a go at these myself!
ReplyDeleteThose are SO freakin' cool!! Isabelle would love them, gonna have to make them!! You genius!! : ) Thanks for the tutorial!
ReplyDeleteThat is adorable! What a great idea.
ReplyDeleteWonderful, so creative!
ReplyDeleteOMW! these are just the cutest! They're gettin pinned for sure and I'm stopping by M & S on my way home from work today so I can have a go - can't wait! TFS
ReplyDeleteThe little black speckles - pepper! I always put pepper on my eggs, don't you?! :) And what a brilliant way to make the leaves. They look perfect. This whole project is fantastic!! Thanks for the tutorial.
ReplyDeleteThis is such a great idea~I love it!!!
ReplyDeleteI love them...Easter treats for my Rainbows sorted!! :)
ReplyDeleteYou can avoid the problem you had with the food colouring two ways. One, add the food colouring to a bit heavy cream or oil first, the water in the food colouring caused the seizing so I'm amazed adding more water actually worked. Add too much and it won't set up. The other is to buy colourings meant for chocolate or icing. They are oil based and not expensive. Many craft and baking stores carry sets with mixed colours just like the little bottles of liquid colour from the grocery store and they are almost as easy to use. Just add tiny amounts on the end of a tooth pick. You can blend colours and oil based so no seizing. And you can use them for frosting, icing and tinting batters too.
ReplyDeleteAdorable and a ton of fun!!! Oh, and the black flecks of vanilla in your "fried egg"? Well, that's the pepper you seasoned the egg with, of course! ;)
ReplyDeleteThese are seriously adorable, Claire! Love them and the little flakes work perfectly as pepper which I love a lot of on my eggs! :)
ReplyDeleteWow, love these. Will have to try it out.
ReplyDeleteThese are adorable Claire!
ReplyDeleteMy favorite part of this post is your hilarious description on making the awesome eggs! Too funny!
Thanks for the great idea's!
Amber
This is why I absolutely adore you...
ReplyDeletecreative genius and you think with chocolate!! :)
Love these...
and I know some kiddos around my house that would enjoy them too...
I may whip up a batch for Easter next weekend! :)
Hugs!!
What a fantastic project, Claire....and so very clever too. These turned out amazingly adorable. You're a smart cookie!
ReplyDeleteamazing, smaller ones would look amazing on a cupcake!
ReplyDeleteVery cute!!!! TFS!
ReplyDeleteOh my gosh Claire - you are just too funny! love these 'look so real' friend eggs! I will be trying them for sure!!
ReplyDeleteNow that's my kind of crafty inspiration!!! Yum
ReplyDeleteClaire, that is such a cute and ingenious idea!! Thanks also for the great tutorial for the eggs as well as the brilliant idea for cutting the leaves! You are clever!! :-)
ReplyDeleteOh my Claire! That is adorable!! You're so much fun!
ReplyDeleteOh my oh my, that is just the coolest thing. We are having a party on the weekend and I think I need to make some eggs for the children, they will love it! Thanks for great idea.
ReplyDeleteMade my mouth water - never knew eggs to do that before - LOL! Adorable project...TFS how you did it!
ReplyDeleteLOVE! They look so real! Tosh is probably squealing aloud at the sight of these chocolate models of her card ;)! So awesome, Claire!
ReplyDeleteOMG...just read again about the leaves with the ornament dies...LOVE! The stitching is amazing!
ReplyDeleteFabulous. What a great idea. Thanks.
ReplyDeleteAbsolutely Brilliant.
ReplyDeleteWhat a super fun idea! You've done a marvelous job explaining it too.
ReplyDeleteYummy and gorgeous Clare, those leaves are perfect, and I love the die cut edes of the bag holder, a gorgeous treat for anyone!
ReplyDeleteFabulous!! gotta try this!
ReplyDeleteHow cool is this egg! Love it!
ReplyDeleteFantastic idea! Your gift bag is adorable too. :) And how clever to use the ornament die for leaves!
ReplyDeleteWhat a brilliant idea Claire, what a pity you can't hand out samples!!!
ReplyDeleteNow, you've giving me more work to do cos I just have, have to try making these. Yummy, scrummy idea, thanks:-)
Gotta pull a Kelly on you here Claire! EEEK!! How cool is this? I've said it before, I'll say it again - your kids are so lucky to have such a clever mum!!
ReplyDeleteOh Claire, what an amazing mind you have! I sat awestruck trying to figure out what you've done here. This is adorable beyond words - thank you for sharing this delectably brilliant idea - you rock!!
ReplyDeleteOh my goodness Claire!! How clever, cute, and oh so yummy!! LOVE your eggs!! And your charming bag with the felt flower and leaves? SWOON!! You never cease to amaze me with your creativity!!
ReplyDeleteSo cute!!
ReplyDeleteGosh Claire, these are so cute! Such a brilliant make, what fun! Thanks so much for the how-to!!
ReplyDelete