

The Cast and Crew for Gina K Designs welcomes you to another fabulous blog hop celebrating the new stamp sets from the July StampTV Release Party! We hope to inspire you with some beautiful card projects as you hop along to each of the designer’s blogs! Today, we are featuring two stamp sets by Therea Momber and Melanie Muenchinger.
French Flair
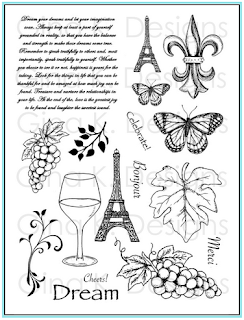
The first set we are featuring is French Flair by Theresa Momber. Theresa has created this wonderful set that will leave you feeling like you may be in Paris or strolling around the wine vineyards in Europe!
The wineglass stamp in the set got me thinking that it would be fun to do something a little different and create a wineglass lampshade. These are fun to use on the dining table for a cozy feel. The shade I've made for today's hop features the small Eiffel Tower stamp and the text stamp from Theresa's set and is perfect for a romantic dinner, but this idea is something that you could use to dress up your table for any reason or season.
The only thing I'm going to insist on is that you use a battery operated candle. Do not use a naked flame candle with these, they are too close to the shade. There's a plethora of good battery operated candles available today - just look at the illumination I was able to get with an already well used well used battery candle, above. Isn't that cozy?
Wineglass shade tutorial and Download
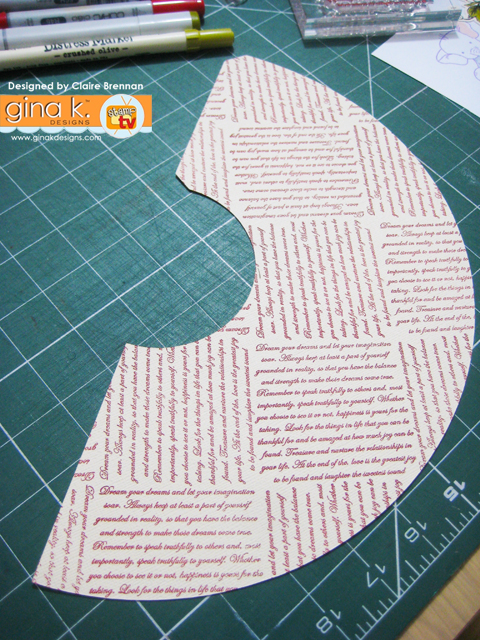
Have you time for a little how-to? sure hope so, gonna go ahead anyhow... :)OK, here's how I started - I cut out my shade shape from 12x12 cardstock, you can make a smaller or larger shade to suit your glass. I have a fairly large wine glass...no clue why that might be...
I stamped the smaller of the Eiffel Tower images repeatedly around the lampshade shape, and I stamped these on the side that I wanted to be showing, the outside of the shade.

On the reverse, or what will be the inside, I stamped an allover pattern with the text from Theresa's set. You can see the position of my tape in the pic. It's really important to use your strongest adhesive here, you'll see why in a bit.
Then I simply adhere the ends, without folding the little tab. You don't want your shade to have a corner...
You can add a little trim if you wish, a little ribbon or braid - I added a little scrap of floral braid that I had lying about. This is what it looks like in the daylight - c'est bon, n'est-ce pas?


However, it really comes into it's own when you turn off the lights - I love how the Eiffel tower image is just that bit stronger than the text, stamping on both side of the shade creates an interesting depth to the overall pattern.

Now that's pretty, but here's a tip for how to really make it shine. If you brush your lampshade with a little oil, the cardstock will turn translucent and you will get so much more glow! This is where extra strong adhesive comes into it's own, but just to be on the safe side, I didn't slather the join with oil, I just very lightly brushed over that area. You can see in the pic below that where I have brushed a patch of this lampshade, it is starting to turn transparent and you can see the text starting to show through from the reverse.

Yep, actually brush on some oil directly to the lampshade, I used olive oil because that's what I had in the cupboard. This is another major reason why you do NOT want to use these with a naked flame, use battery tealights only folks! I insist.

This is my battery candle in my wine glass, it's just a cheap battery candle that I picked up in Lidl, I got a box of 4 of them for under £2 last Christmas.
Now below I have two pics for you so you can see the comparison. The left hand pic is my lampshade before oiling, the right hand pic is my lampshade after oiling. Oiling is optional and if you want your shades to become a family heirloom I would consider not oiling, there's no way to tell if the oil you are going to use will stand the test of years in a cupboard, but for a piece of ephemeral fun it works a treat!
Oiling can be useful to make ordinary paper and card go translucent, especially if you are using lighter coloured cardstock. You can use light pinks, greens blues etc, colours that you can't sometimes find in vellums etc. If you are happy to use neutral tones then you could consider using baking paper or greased proof paper for your shades or even a heavy vellum, these would not require oiling as they are already translucent. Be sure to experiment with your cardstocks and the inks you will be using, just in case the oil makes your ink run. I didn't have any problems with that, but I did a test patch just to check first.
The French Flair set is filled with images that would look great on these shades!
If you fancy making a wineglass shade for yourself, I have made up the cut file as
a .pdf and as an .svg file, you can either use it in your Silhouette Cameo or similar or print it out as a pdf and just cut it out with a craft knife.
You can access those files here - click link to get them in my dropbox.https://www.dropbox.com/s/earnzazdqkms7vr/Wine%20Glass%20cut%20files%20Claire%20Brennan.zip?dl=0
All I ask is that you don't pass on the file, but tell folks where you got it and encourage them to come and get it from here - Thanks folks, much appreciated.

Theresa's set also features a gorgeous butterfly in two sizes and I used the larger one here as a focal point on this card. I stamped the butterfly in grey over Ivory cardstock and then stiched around the panel before sticking it to the card base. I stamped the large butterfly in black ink and then used clear embossing powder with a heat gun. This does two things for me, it deepens the black colour and it also means that the copic markers won't make the black ink bleed. Then I coloured with yellows and oranges, I think it looks like a mini stained glass window, the colours are so vibrant.
Stately Flowers 10
The second set we are featuring is Stately Flowers 10 by Melanie Muenchinger. As Gina says - Melanie has done it again! She has added another wonderful set to her Stately Flowers collection. This is set number 10 and what a wonderful set it is! You will be able to use all of Melanie’s flowers sets to fill the seed packet in this set as an adorable way to send the perfect message! The possibilities are endless for making beautiful cards for any occasion.

I am addicted to the dogwood flowers in this set, and for this card I stamped them on some white cardstock and coloured around them to make the flowers pop. I then made a seed packet out of an old brown envelope using the seed packet stamp. I cut an aperture from the front of the envelope (I opened out the envelope first and used a craft knife) and popped the coloured flowers in behind the aperture. I didn't want my flowers to be hidden behind the top of the seed packet and so I sliced around the edge of that top flower (craft knife again) and made sure to slide the seed packet down in behind the flower. I really adore these flowers, did you see my card from yesterday, I'm sure you did, if not, here's a reminder...

Okeydokey!
That's all for today folks, don't forget to comment to be in with a chance of winning a $20 Gina K Designs gift certificate! To see who won, check the Big News Forum at StampTV a few days after the hop.
If you are ready for more inspiration just click on the links below
for more from Gina and the Cast & Crew:
Gina K
Theresa Momber - Illustrator for French Flair
Melanie Muenchinger - Illustrator for Stately Flowers 10
Allie Gower
Beth Silaika
Cathy Tidwell
Claire Brennan
Karen Hightower
Kendra Wietstock
Sean Fetterman
Laurie Schmidlin
Sheri Gilson
Susie Moore
Theresa Momber - Illustrator for French Flair
Melanie Muenchinger - Illustrator for Stately Flowers 10
Allie Gower
Beth Silaika
Cathy Tidwell
Claire Brennan
Karen Hightower
Kendra Wietstock
Sean Fetterman
Laurie Schmidlin
Sheri Gilson
Susie Moore
Don’t forget to pop over to the Gina K Designs Store and check out all of the new products available this month in the “What’s New” section at http://www.shop.ginakdesigns.com/
Thank you for stopping by!


Oh my word!! A lamp!!!!!
ReplyDeleteThese are all amazing!
Thanks Melanie! Just hope nobody sets themselves on fire... did I mention it was batteries only???
DeleteWhat a great idea and beautiful lampshade! I love it and all the gorgeous cards. Thanks for the tutorial!
ReplyDeleteWonderful set to work with Theresa and I'm not done yet! :)
DeleteYour lampshade and tutorial are amazing. The rest of your projects are equally fantastic.
ReplyDeleteah cheers Allie! Appreciate the kind words!
Deleteyou are crazy talented!
ReplyDeletehugs missus!
DeleteClaire, I love all your projects, and the lamp shade is the bomb!!! I love it and when the light are off, It will be the star attraction of any room! Your cards are fantastic! Thanks for sharing and Inspiring! :) <3
ReplyDeletethanks Karen!! hugs!
DeleteI love the lampshade. So many possibilities. Thank you for the idea.
ReplyDeletethanks for popping by Chris!
DeleteWOW, so creative!! your lampshade is amazing and I also love your seed packet card, beautiful work Claire!!
ReplyDeletethanks Cindy, much appreciated!
DeleteGreat tutorial! What a concept! The cards are fantastic too!
ReplyDeleteMany thanks Beth! :)
DeleteHoly cow! That lampshade is awesome, I must try this. Thank you for the file. All of the cards are really pretty too. I'm certain that I will be CASE'ing them too.
ReplyDeleteThanks Dawn - sorry about the link, I just got that fixed, no idea why it went down, if you have any further trouble just shout and I'll email it!
Delete:(
ReplyDeleteI just realized the link to the file is broken.
Wow that lampshade is amazing, love all your other projects as well.
ReplyDeleteThank you! :)
DeleteYou are so creative! Love the lampshade. The cards are beautiful.
ReplyDeleteThanks Lisa! :)
DeleteWhat a clever and fabulous project! And I love the Dogwood card too! Beautiful work! Kim Marie
ReplyDeleteMany thanks Kim Marie, thanks for popping in!
DeleteI love the lampshade. I love all the cards, actually, but the lampshade just kicked it up a notch. Amazing. Thanks for sharing.
ReplyDeleteMany thanks Becky, much appreciated!
DeleteWhat a charming idea. I tried to download the pattern and it says "error". So I couldn't download it. Bummer!
ReplyDeletePenny, I'm so sorry, I have fixed the link! It should be working now but if you can't access it let me know on fb and I'll get it to you there!
DeleteThe lampshade is fantastic.
ReplyDeletethanks for sharing such an ingenious idea.
Love the butterfly background and the
beautiful butterfly that is colored.
Great projects.
thanks for sharing.
Mary, many thanks! I appreciate you taking the time to leave such a nice comment!
DeleteI so agree with your use of battery candles! As an owner of two cats I know how dangerous it is to have open flames!
ReplyDeleteI love this. I would like to make one myself.
ReplyDeleteFAbulous idea to decorate a lamp shade and beautiful floral and butterfly cards.
ReplyDeleteWow, the lampshade is so pretty - thanks for the tutorial
ReplyDeleteAwesome project!!! Thanks so much for the download pattern. One question - did you use regular GinaK ink or Staz-on for stamping?
ReplyDeleteYour lampshade is such a fun idea! I have used the oiling technique (I discovered this idea when french fries left translucent spots on paper!)on paper to create a stained glass effect. They are beautiful hanging in the window framed in black card. My students love it! I love your Dream card!
ReplyDeleteBeautiful cards and a gorgeous lampshade! Thanks for the tutorial!
ReplyDeleteBeautiful cards and great tutorial.
ReplyDeleteAll of your cards are beautiful. Dogwoods are among my favorite flowers and you really did a bang up job with them. I love this lamp shade idea. What cute gifts they would make. I may try this on vellum or parchment. Thank you soo much for the cut files and all of the inspiration.
ReplyDeleteThanks for showing me an alternative use for my wineglass--whenever it is not being used for the good stuff!LOL!
ReplyDeleteLoved that lampshade...wow...thanks for sharing...hugs
ReplyDeleteOh my goodness....what a great idea! Thanks for sharing.
ReplyDeleteThe lamp shade is such a fun idea! I love your coloring on the dogwoods!
ReplyDeleteClaire your projects are amazing. Love the wine glass lamp shade :)
ReplyDeleteYour creativity is endless. This wine glass shade is simply adorable.
ReplyDeleteThe lamp is so awesome!!! Love it !
ReplyDeleteWOW! What a unique idea with the wine glass shade. You have my mind thinking spider web for halloween, the Christmas tree from Winter Cheer, etc. So fun for a party. Also love the dogwood card. Thanks for sharing with all of us!
ReplyDeleteThat wineglass lampshade is simply stunning. Wow!!!! You make some wonderful designs that is for sure.
ReplyDeleteYour talents are amazing! I love the wine glass shade you made and the cards are so gorgeous too! So glad Gina added you to the team!
ReplyDeleteOh, I love the lampshade! How creative! Your cards are also beautiful! Thanks for the inspiration!
ReplyDeleteWow Claire! I could not think up a wine glass shade like this! Thank you for sharing how you made it. You have a lovely collection of cards, too! With aloha ♥
ReplyDeleteWOW!! Fabulous wineglass lampshade - so creative. And your cards are equally fabulous. Just love them!
ReplyDeleteWhat awesome cards - but that lampshade - WOW!! Thanks for the super tutorial and the pattern.
ReplyDeleteYour lampshade project is just too sweet and unique. Fantastic job! Thank you for sharing your projects and the pattern so we can create one also. Fantastic job!
ReplyDeleteMy first thought was to say shut up but since that's rude all I can say is wow and wine glass candle with shade is amazing.
ReplyDeleteThat wine glass shade is SUPER COOL!! Thanks for sharing how you did it! Love your cards too!! :-))
ReplyDeleteLove your dogwood cards. The lampshade is really unique.
ReplyDeleteEEEEEEEEEEEEEEEEEEEEEEEEEEEEEEEEEEEEEEEEEEEEE! The lamp shade is so freakin' cool!!!!! The cards are gorgeous! Is there anything you can't do lady? I'm so glad you are on our team so you can teach and train me! xoxoxoxo Seanie
ReplyDeleteGorgeous projects!
ReplyDeleteWOW....you have been busy!! Love all your projects especially that lampshade!
ReplyDeleteWow! All gorgeous but that wine glass shade is truly inspired
ReplyDeleteThis lampshade is fantastic! TFS and your cards are so adorable - looks like you had some fun creating! Blessings
ReplyDeleteAll I can say is Wow. What a wonderful project. The cards are gorgeous too.
ReplyDeleteBeautiful cards. The lamp shade idea is wonderful. Thank you for sharing.
ReplyDeleteSo beautiful! Love that lampshade!
ReplyDeleteBeautiful lamp shade and beautiful cards
ReplyDeleteKathleen
So many great ideas and inspiration here. Thanks.
ReplyDeleteLove your fun lampshade, as well as the cards. Thanks for all the instructions on how to do it, as well as the cut file.
ReplyDeleteYour projects are all perfect. I love your ideas and execution.
ReplyDeleteOkeydokey!, some people have all the fun.
ReplyDeleteA really great project with the shade and lovely cards.
ReplyDeleteLove the shade on the wine glass. Very creative use of the stamps.
ReplyDeleteCharming idea! I think if you used mineral oil, found in the pharmacy section, there would be no fear of it eventually going rancid!
ReplyDelete